*********************************************************************************************************************************************
JUNE 2024 UPDATE
*********************************************************************************************************************************************
*********************************************************************************************************************************************
KARL CROWTHER
*********************************************************************************************************************************************
KIER HARDY
*********************************************************************************************************************************************
MIKE WHITCHURCH
*********************************************************************************************************************************************
ANDY LEE
*********************************************************************************************************************************************
*********************************************************************************************************************************************
![]()
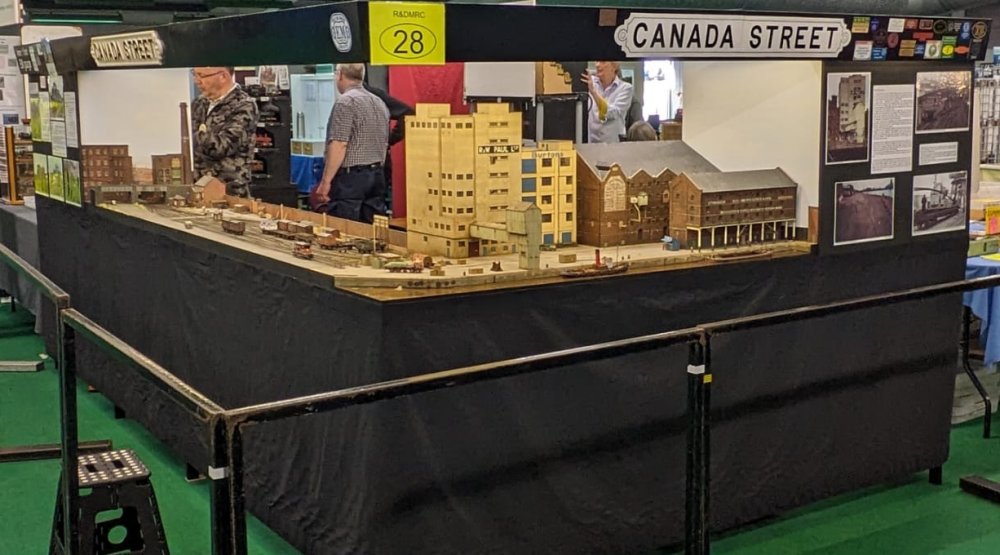 Canada Street appeared at the Railex '24 exhibition in Aylesbury on the 25th & 26th of
May, and is seen here all set up on the Friday evening and ready for action. Regular
operators Ian Manderson, Steve Wilkins, Tim Cobb and Paul Hatfield were joined by
Carole Johnson, and there was a calmness about the team all weekend, just as if Pete
had nipped away from the layout for a look around the show.
Canada Street appeared at the Railex '24 exhibition in Aylesbury on the 25th & 26th of
May, and is seen here all set up on the Friday evening and ready for action. Regular
operators Ian Manderson, Steve Wilkins, Tim Cobb and Paul Hatfield were joined by
Carole Johnson, and there was a calmness about the team all weekend, just as if Pete
had nipped away from the layout for a look around the show.
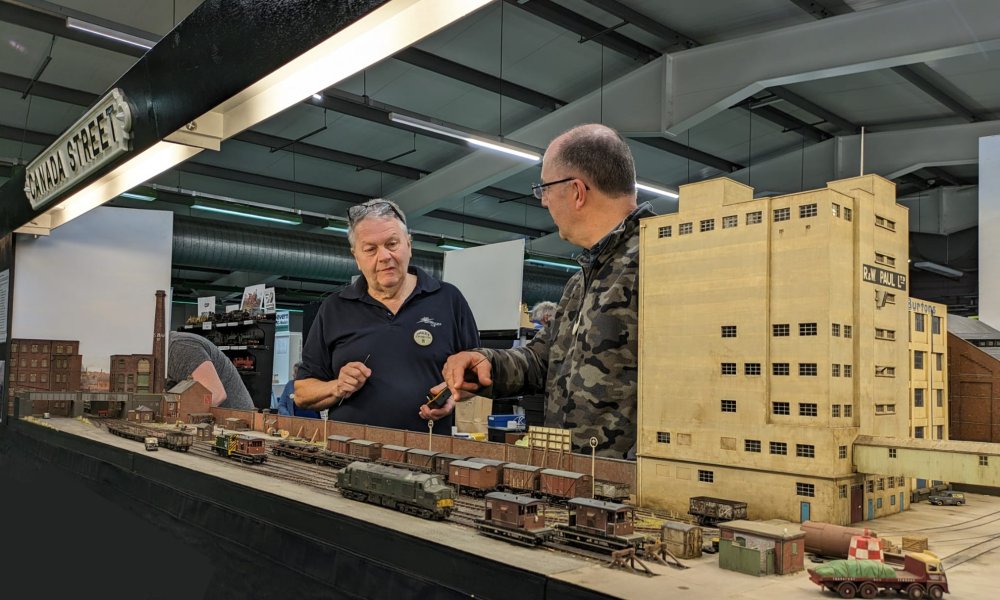 A lull in proceedings as Steve and Tim discuss a shunting move.
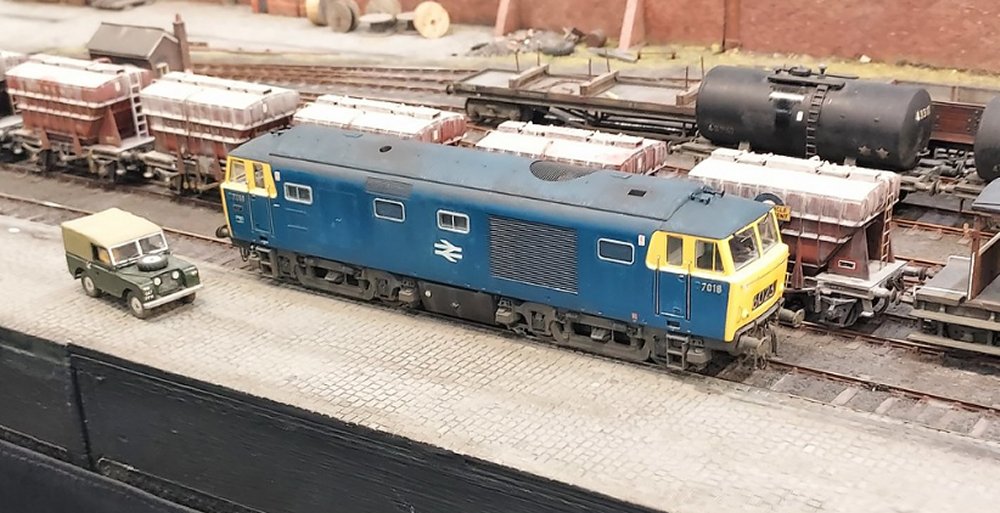 Here are some images taken at the weekend by Chris Hopper - Hymek 7018 awaiting its next duty.
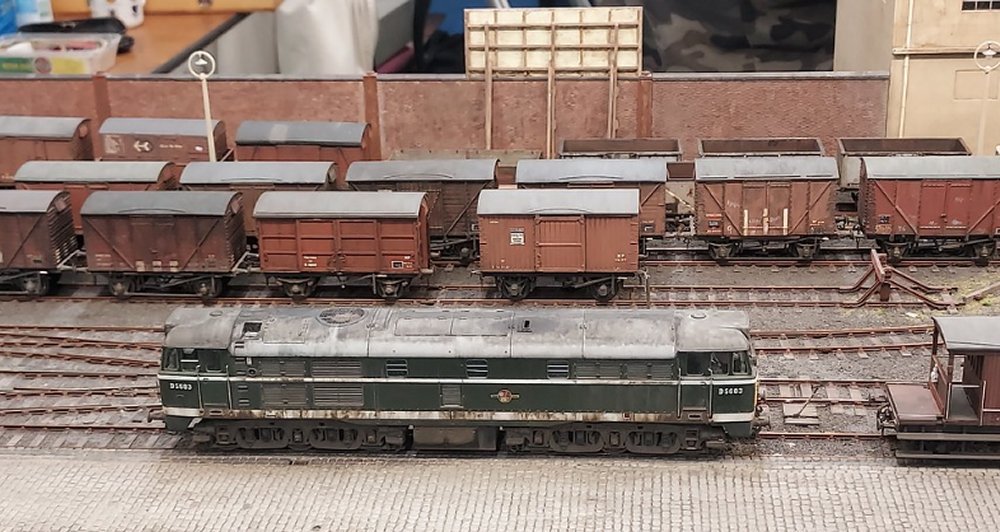 With vans aplenty in the sidings, here's a broadside shot of Brush type 2 - D5683.
 08296 is captured shunting a rake of bogie bolsters loaded with steel bar. After a most
enjoyable day operating the layout, it was off to the pub for a beer and something to eat.
08296 is captured shunting a rake of bogie bolsters loaded with steel bar. After a most
enjoyable day operating the layout, it was off to the pub for a beer and something to eat.
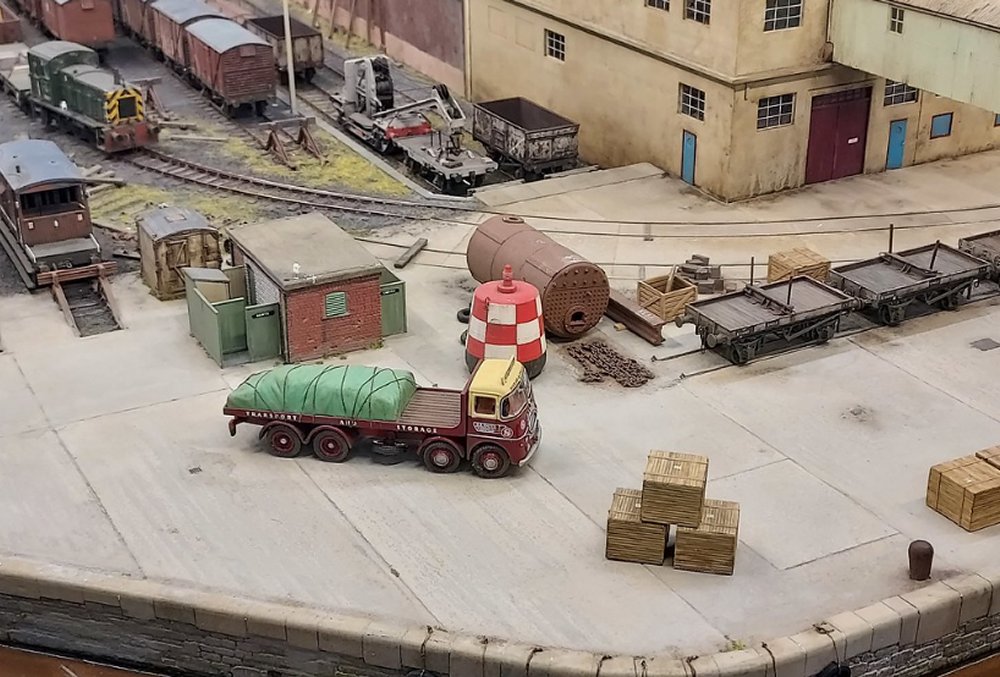 A view of the quayside as Class 03 trundles around with a short rake of wagons.
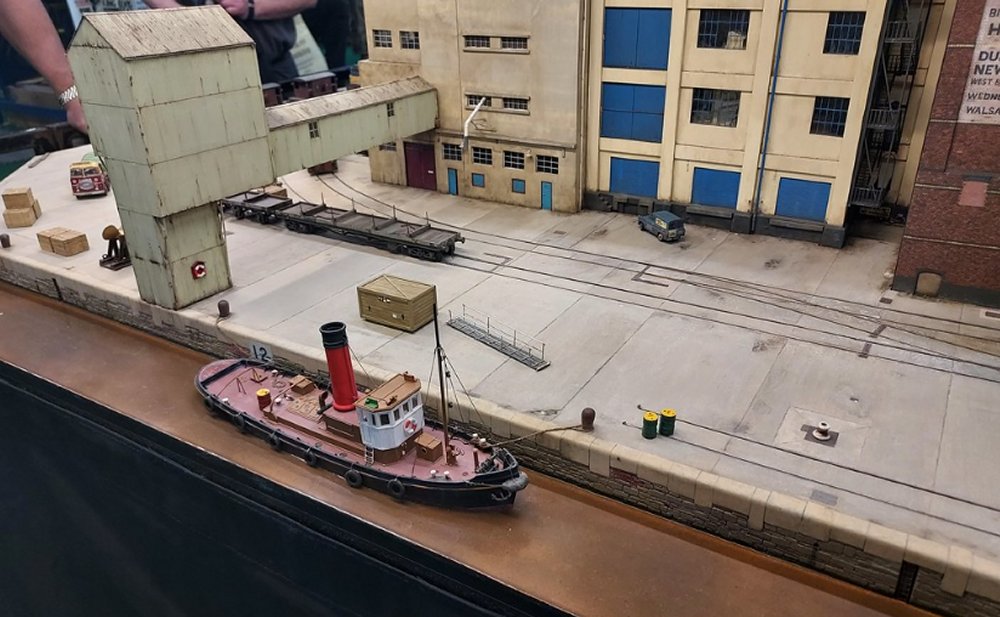 Tug boat 'Julia' moored up. Further images taken at Railex can be found here
on Chris' Flickr album.
Tug boat 'Julia' moored up. Further images taken at Railex can be found here
on Chris' Flickr album.
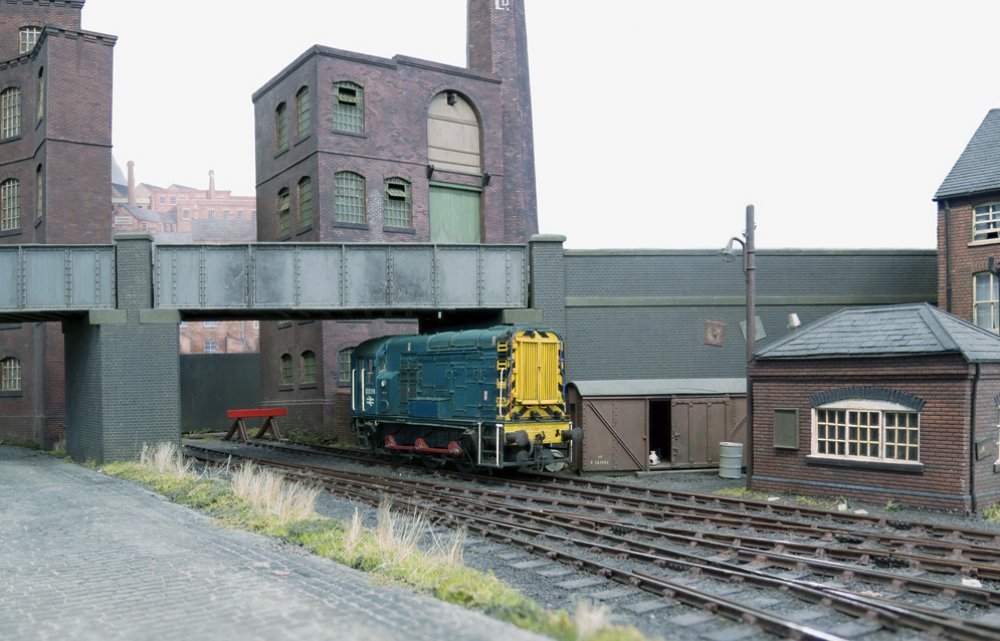 A few more snaps taken by Ian - here's D3316 resting in the headshunt.
 37136 gets ready for departure after the train has been prepared.
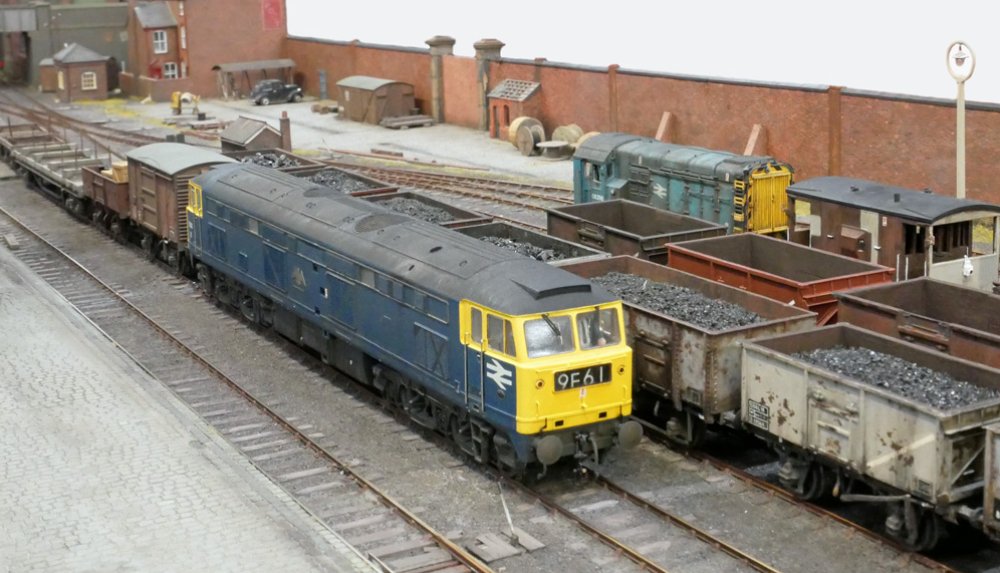 Brush prototype 1200 Falcon brings a mixed freight into the yard for sorting.
 Ian says - my only 'lump in the throat' moment was when they announced the award for best layout
in show as voted for by the exhibitors, with Canada Street coming first. The best scenic item
on the assembled layouts as judged by Barry Norman was awarded to the Maltsters building.
Ian says - my only 'lump in the throat' moment was when they announced the award for best layout
in show as voted for by the exhibitors, with Canada Street coming first. The best scenic item
on the assembled layouts as judged by Barry Norman was awarded to the Maltsters building.
![]()
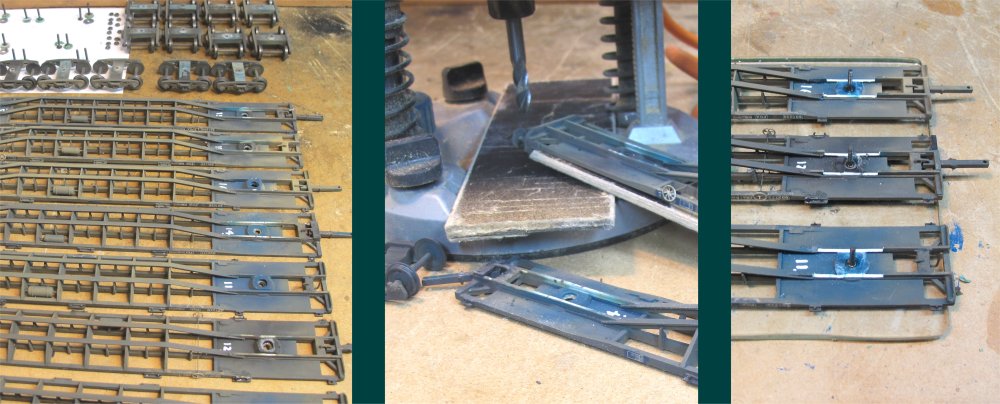
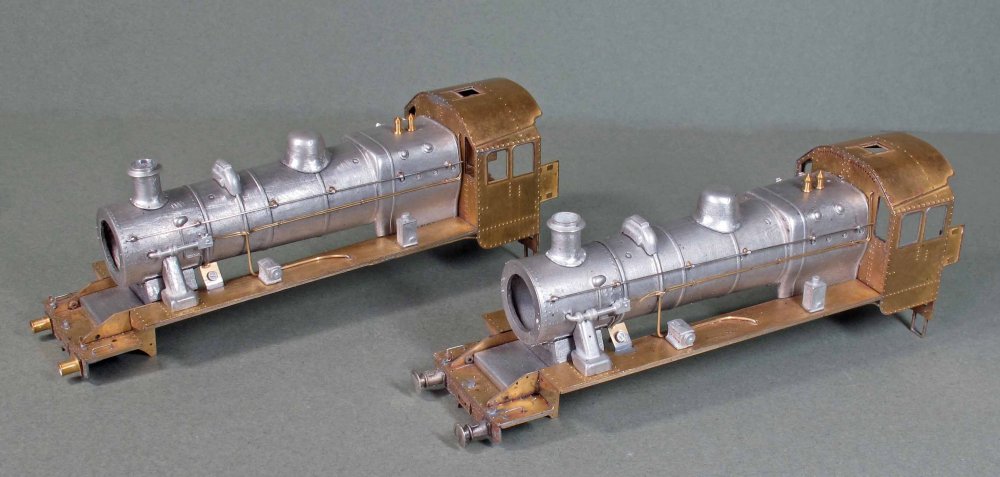 Further progress this month on the two Comet Ivatt 2-6-0 kits. The loco superstructures
are now about 90% complete.
Further progress this month on the two Comet Ivatt 2-6-0 kits. The loco superstructures
are now about 90% complete.
 The basic chassis have also been wheeled up and running. Mine is the one on the right,
with Markits wheels and the Mashima 1220 motor, while the P4 one on the left has Gibson
wheels and a 1420 motor (both with High Level RoadRunner gearboxes).
The basic chassis have also been wheeled up and running. Mine is the one on the right,
with Markits wheels and the Mashima 1220 motor, while the P4 one on the left has Gibson
wheels and a 1420 motor (both with High Level RoadRunner gearboxes).
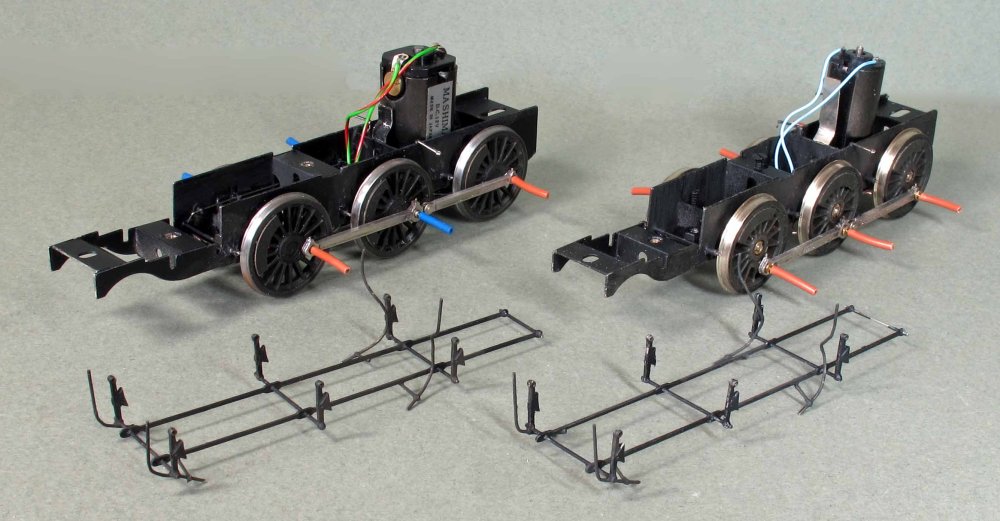 Chassis pair with completed, de-mountable brake gear assemblies (also including the sand
pipes from 0.4mm wire).
Chassis pair with completed, de-mountable brake gear assemblies (also including the sand
pipes from 0.4mm wire).
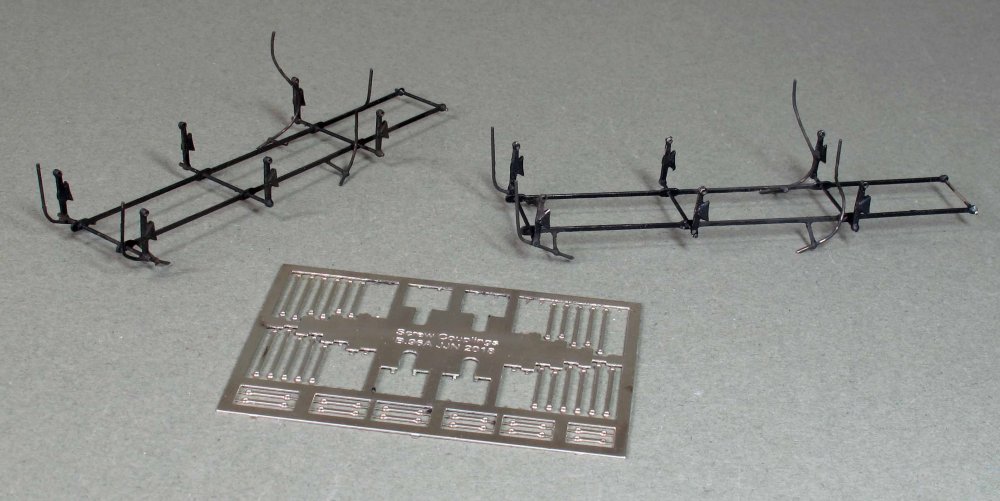 An interesting tip I may be able to pass on here. Have you ever needed thin metal strip
with a hole drilled accurately into the end of it? The prefect things are the left-over
links you get with the Rumney Models screw coupling frets. There are lots of spares and
I use them to form the supporting strut at the end of sandpipes � just bend the hole at
one end through 90deg, feed on and solder to the pipe, attaching the other end to the
brake rigging and then cut off the excess. They�re also perfect for making rodding
guides for use on lower quadrant signal posts.
An interesting tip I may be able to pass on here. Have you ever needed thin metal strip
with a hole drilled accurately into the end of it? The prefect things are the left-over
links you get with the Rumney Models screw coupling frets. There are lots of spares and
I use them to form the supporting strut at the end of sandpipes � just bend the hole at
one end through 90deg, feed on and solder to the pipe, attaching the other end to the
brake rigging and then cut off the excess. They�re also perfect for making rodding
guides for use on lower quadrant signal posts.
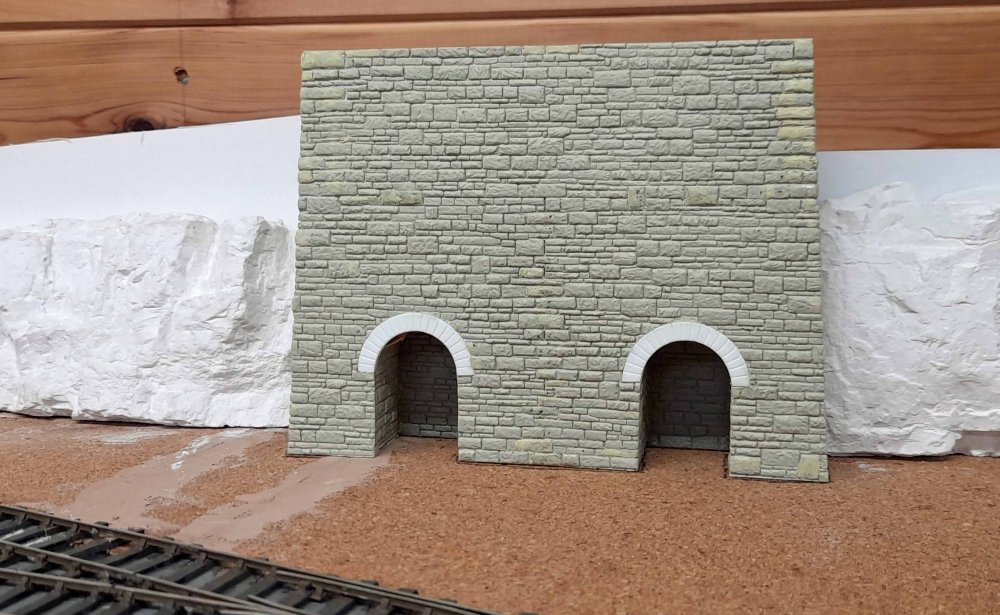 Steady progress on the layout with the quarry�s disused lime kilns beginning to take
shape, using my preferred Will Coarse Stone sheets as the basis, as deployed extensively
on the Hebble Vale layout.
Steady progress on the layout with the quarry�s disused lime kilns beginning to take
shape, using my preferred Will Coarse Stone sheets as the basis, as deployed extensively
on the Hebble Vale layout.
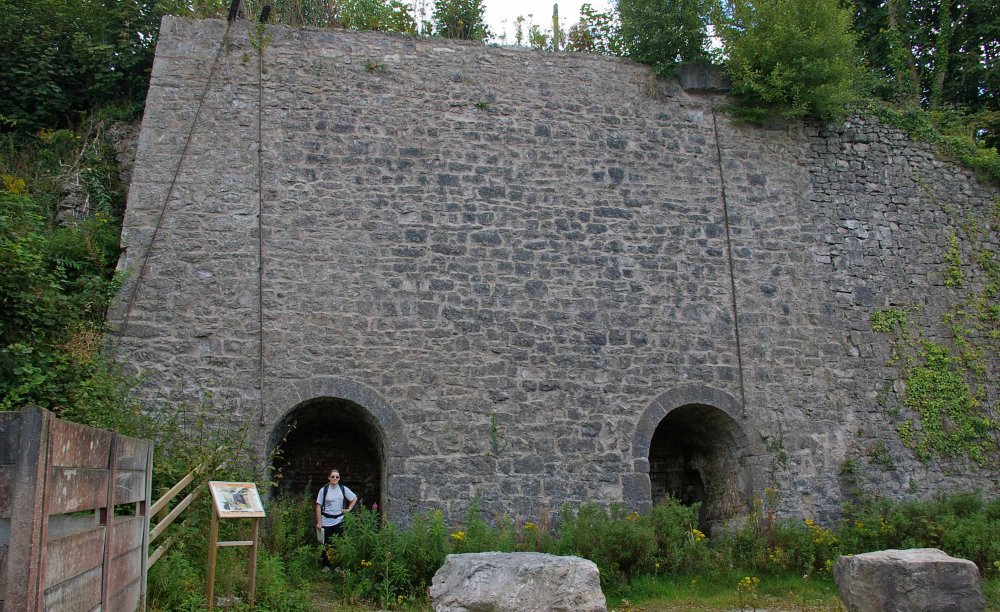 The prototype basis is the feature that can still be viewed at Sandside � here with my
other half acting as a 5-foot measuring stick!
The prototype basis is the feature that can still be viewed at Sandside � here with my
other half acting as a 5-foot measuring stick!
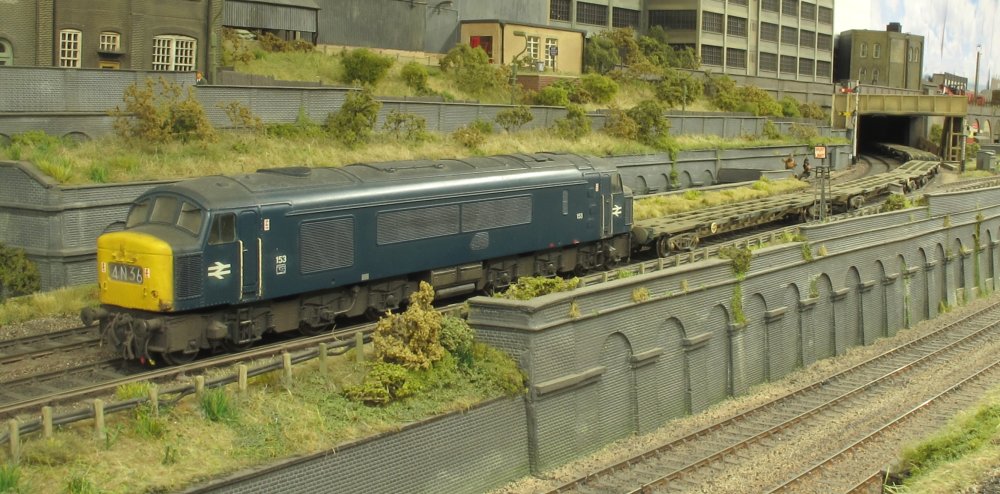
 And taking in a wider view of the layout it can be seen that a start has been made on
some ballasting, now we�re into warmer weather which speeds up the glue setting. I�ll
be doing a �Signalling for the Kentside Branch� demo at Scalefour Crewe over the weekend
of 8th & 9th June, so maybe see some of you there?
And taking in a wider view of the layout it can be seen that a start has been made on
some ballasting, now we�re into warmer weather which speeds up the glue setting. I�ll
be doing a �Signalling for the Kentside Branch� demo at Scalefour Crewe over the weekend
of 8th & 9th June, so maybe see some of you there?
![]()
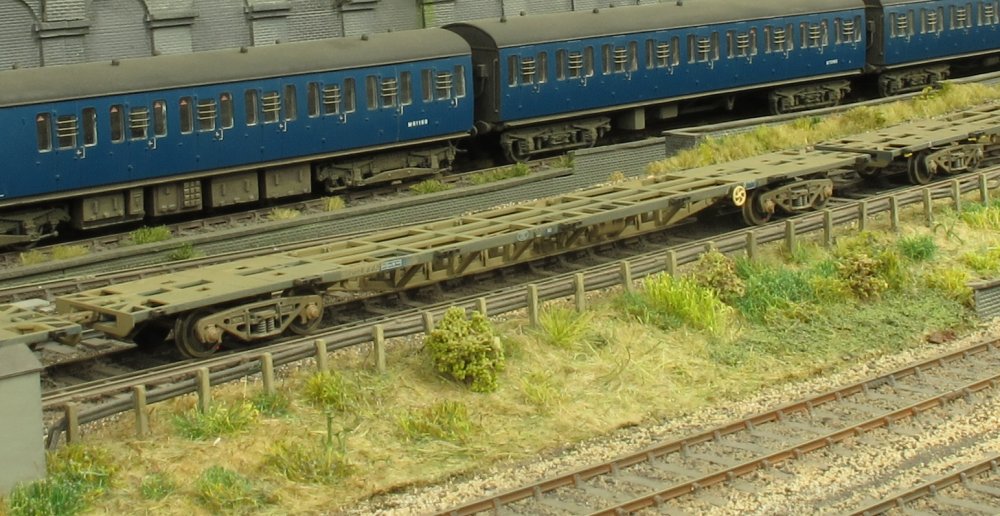
 New into service are some of the Bachmann Freightliner wagons. I'd like to thank those
who got in touch regarding
the wanted advert recently, the fleet is now bolstered by another 8 vehicles along with a
pair of second-hand glue covered outers (which I'd had for some time) and were prime
candidates for conversion.
New into service are some of the Bachmann Freightliner wagons. I'd like to thank those
who got in touch regarding
the wanted advert recently, the fleet is now bolstered by another 8 vehicles along with a
pair of second-hand glue covered outers (which I'd had for some time) and were prime
candidates for conversion.
 This is a inner wagon FFA with bar coupling at both ends, and are as rare as hen's
teeth on the second-hand market. Unfortunately the wagon
dimensions and bogie centres are a few millimetres different between this FFA and the
FGA outer, so a perfect conversion isn't possible without a lot of extra work.
This is a inner wagon FFA with bar coupling at both ends, and are as rare as hen's
teeth on the second-hand market. Unfortunately the wagon
dimensions and bogie centres are a few millimetres different between this FFA and the
FGA outer, so a perfect conversion isn't possible without a lot of extra work.
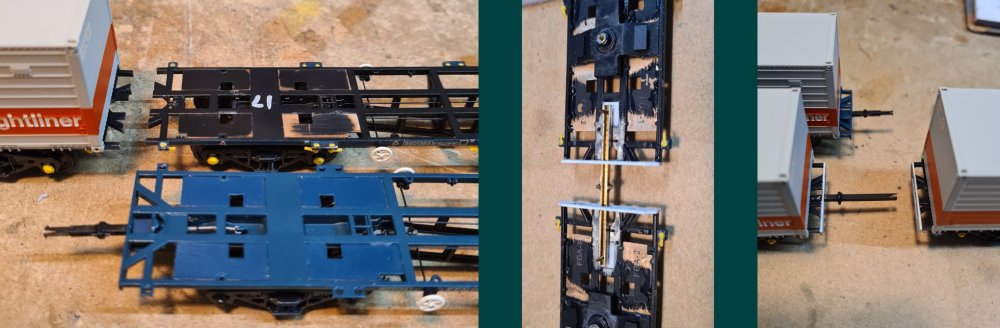 I set to with a saw and removed the bufferbeams from the 2 black outers. The remaining
diagonal bracing is different to the blue inner, but with containers placed either side,
it's going to take some noticing. A drawbar made from brass channel section connects the
2 vehicles together using the new pins fitted to the underside of the wagon.
I set to with a saw and removed the bufferbeams from the 2 black outers. The remaining
diagonal bracing is different to the blue inner, but with containers placed either side,
it's going to take some noticing. A drawbar made from brass channel section connects the
2 vehicles together using the new pins fitted to the underside of the wagon.
 The pair of ex-FGAs - now FFAs if you squint. Colin Craig could no doubt spot the slight
error in the bogie positions and trussing, but it's a couple of millimetres and I can live
with it for the sake of a bit of chopping and glueing at less than a quarter of the price of a inner wagon.
The pair of ex-FGAs - now FFAs if you squint. Colin Craig could no doubt spot the slight
error in the bogie positions and trussing, but it's a couple of millimetres and I can live
with it for the sake of a bit of chopping and glueing at less than a quarter of the price of a inner wagon.
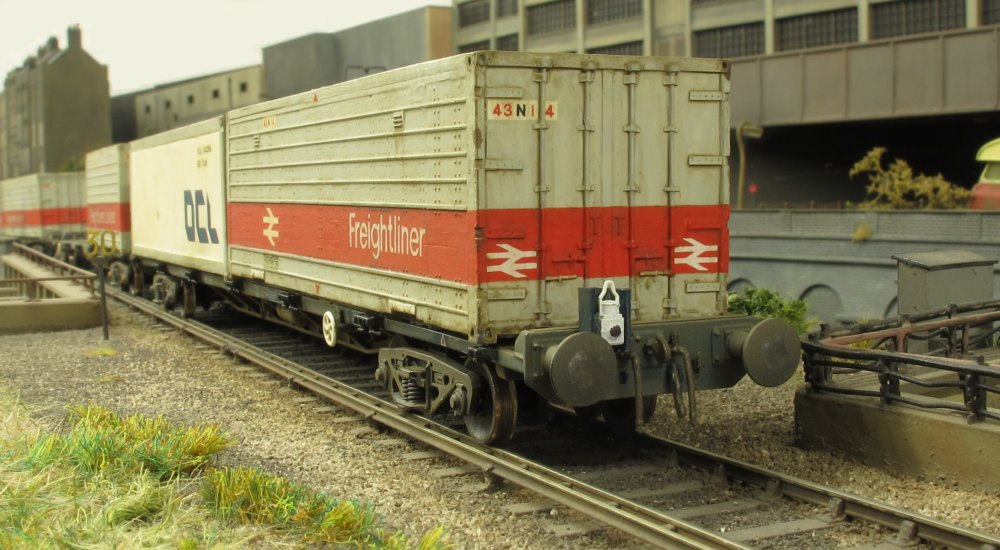 Tail end Charlie loaded with a pair of 30ft containers. I've added the draught shield
for the tail lamp - a common feature on Freightliner outers when oil lamps were used,
to prevent them from being blown out.
Tail end Charlie loaded with a pair of 30ft containers. I've added the draught shield
for the tail lamp - a common feature on Freightliner outers when oil lamps were used,
to prevent them from being blown out.
 The freightliner rake also consists of 7 Hornby wagons (5+2) which were heavily converted
by Greg many years ago, with new underframe trussing made from brass and strene strip,
and replacement white metal bogies which glide along nicely without rocking. Unfortunately
the Hornby wagons ride 2.5mm higher as seen in these 2 images.
The freightliner rake also consists of 7 Hornby wagons (5+2) which were heavily converted
by Greg many years ago, with new underframe trussing made from brass and strene strip,
and replacement white metal bogies which glide along nicely without rocking. Unfortunately
the Hornby wagons ride 2.5mm higher as seen in these 2 images.
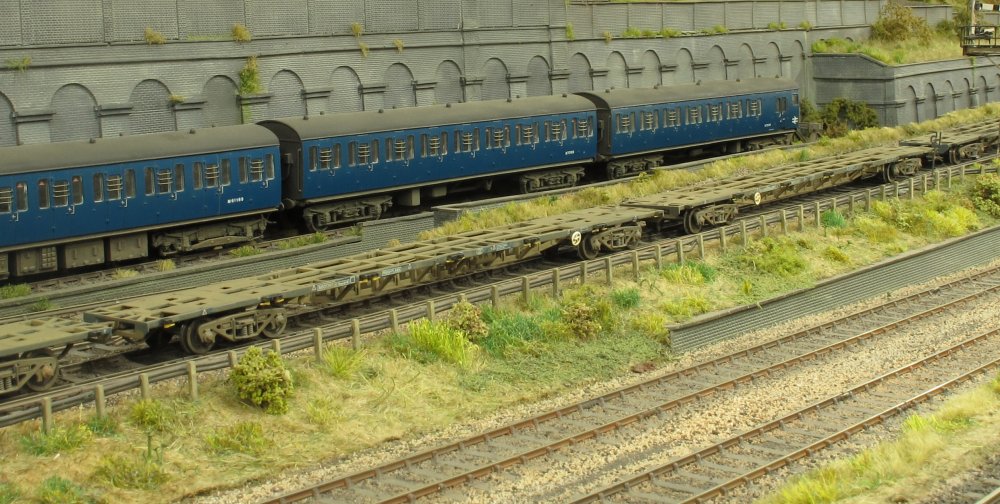
 With the amount of work that had been put into these flats it was decided to retain them
in the rake. A makeshift milling operation was carried out using a router to reduce the
ride height, then refitting the pivots and bogies.
With the amount of work that had been put into these flats it was decided to retain them
in the rake. A makeshift milling operation was carried out using a router to reduce the
ride height, then refitting the pivots and bogies.
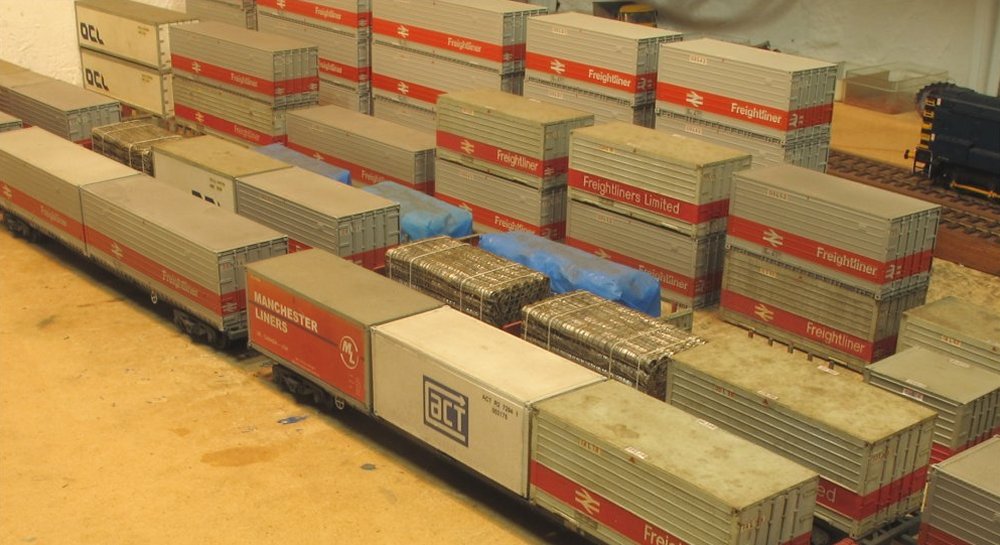 The 7 modified Hornby wagons are seen here being loaded with a selection of containers,
mainly to hide the less detailed decks when compared with the Bachmann wagons.
The 7 modified Hornby wagons are seen here being loaded with a selection of containers,
mainly to hide the less detailed decks when compared with the Bachmann wagons.
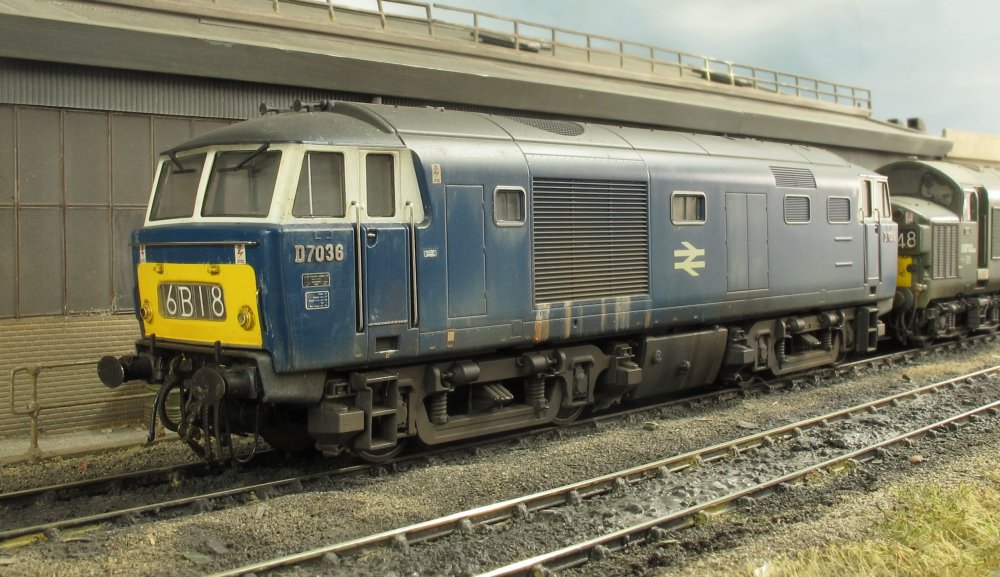 Here's a couple of snaps of visiting Shenston Road motive power, starting off with
Hymek D7036 at Hornsey Road depot - a Heljan model.
Here's a couple of snaps of visiting Shenston Road motive power, starting off with
Hymek D7036 at Hornsey Road depot - a Heljan model.
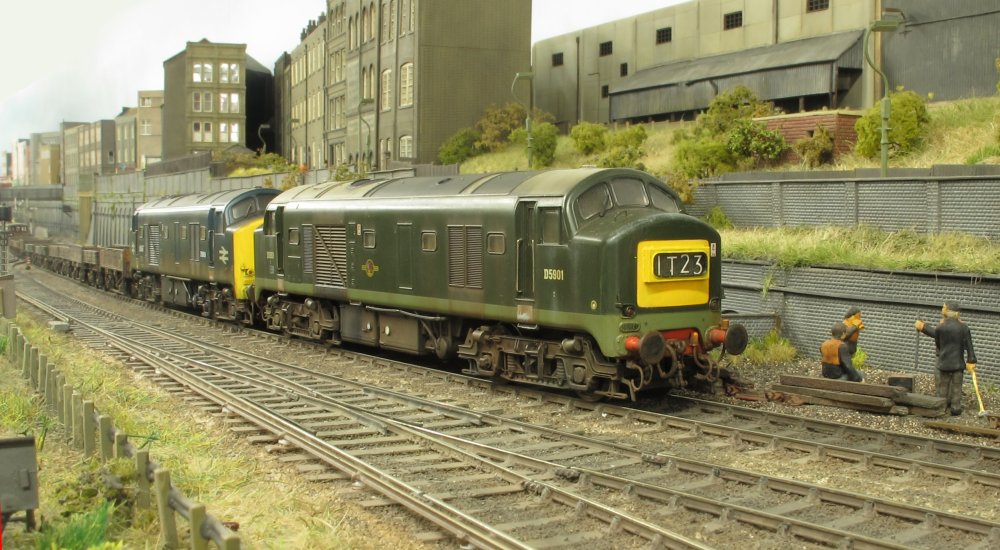 A pair of Baby Deltics D5901 & D5909 in charge of a spoil train, both having received
replacement 3D printed headcode boxes to replace the undersized Heljan versions.
A pair of Baby Deltics D5901 & D5909 in charge of a spoil train, both having received
replacement 3D printed headcode boxes to replace the undersized Heljan versions.
![]()
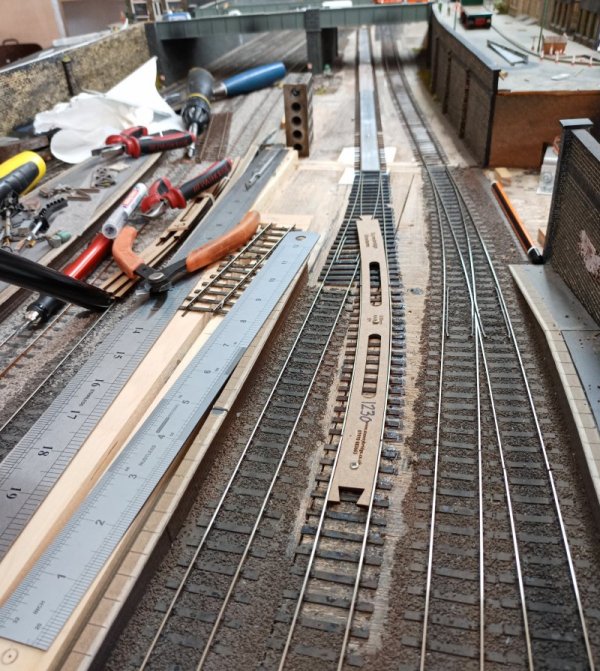 Whilst successfully getting the 4 main tracks up and running last month, the new through
lines leading to the spirelix hadn't been tested. It was found that due to my dodgy turnout
building and the fact I had to split it across a baseboard joint it was less than
satisfactory, so a new turnout was inserted and laid entirely on one board with the required
track and wiring alterations being carried out. Platform realignment is ongoing.
Whilst successfully getting the 4 main tracks up and running last month, the new through
lines leading to the spirelix hadn't been tested. It was found that due to my dodgy turnout
building and the fact I had to split it across a baseboard joint it was less than
satisfactory, so a new turnout was inserted and laid entirely on one board with the required
track and wiring alterations being carried out. Platform realignment is ongoing.
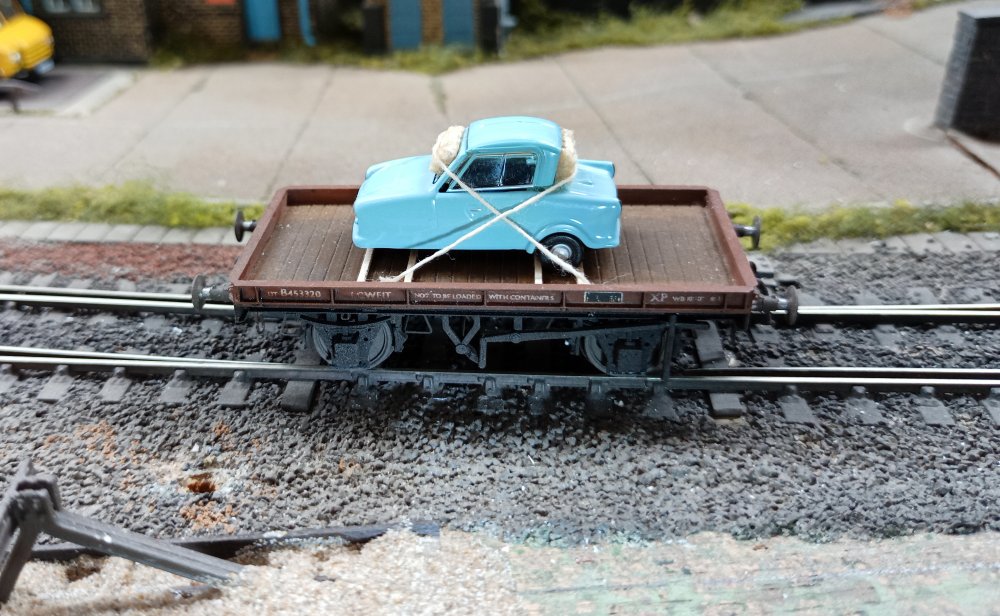 As previously mentioned I am currently out of rail, so a few rolling stock projects have
been undertaken. Having already got 2 Invacars on dia 1/001 Lowfits I've rung the changes
and put it on a Red Panda steel sided variety. Other than converting a Revolution Caroline
inspection saloon and 2 Accurascale coaches (by carefully drawing the wheels up the stub
axle to maintain the overall length), it's been a quiet month.
As previously mentioned I am currently out of rail, so a few rolling stock projects have
been undertaken. Having already got 2 Invacars on dia 1/001 Lowfits I've rung the changes
and put it on a Red Panda steel sided variety. Other than converting a Revolution Caroline
inspection saloon and 2 Accurascale coaches (by carefully drawing the wheels up the stub
axle to maintain the overall length), it's been a quiet month.
![]()
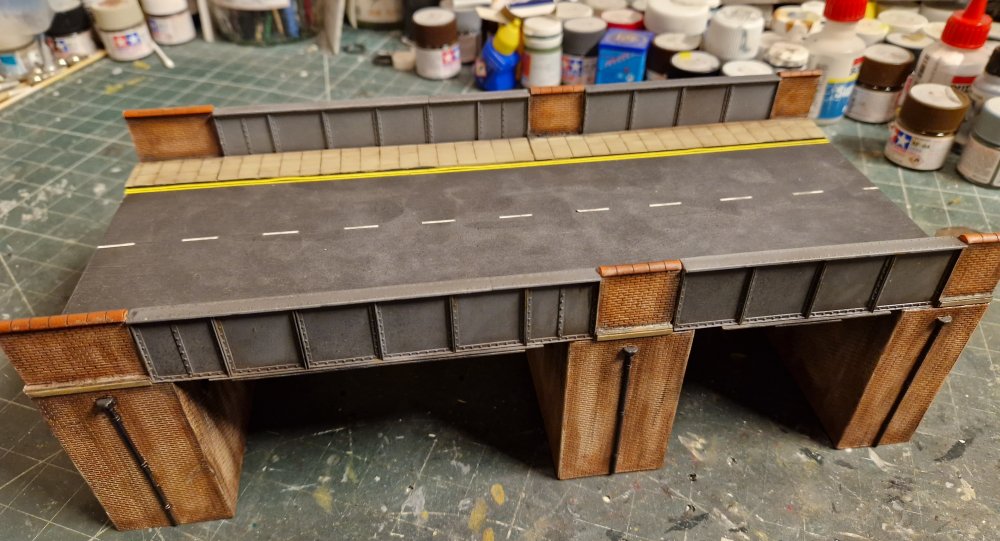 Starting off this month with a road bridge which will form part of the scenic break at
the end of the layout, constructed mainly from Wills brick sheets and girder sections.
I went to Railex '24 in Aylesbury and met up with my old school pal Gavin Clark of the
Scalefour Society. Both Gavin and Pete were a huge influences on me as a teenager in
the Cheadle Hulme School Model Railway Society. They were 5 years older than me and
had amazing model making skills which have always been inspirational to me.
Starting off this month with a road bridge which will form part of the scenic break at
the end of the layout, constructed mainly from Wills brick sheets and girder sections.
I went to Railex '24 in Aylesbury and met up with my old school pal Gavin Clark of the
Scalefour Society. Both Gavin and Pete were a huge influences on me as a teenager in
the Cheadle Hulme School Model Railway Society. They were 5 years older than me and
had amazing model making skills which have always been inspirational to me.
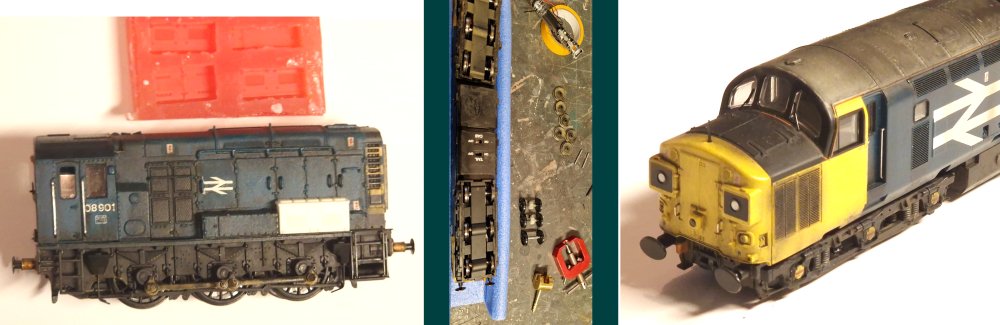 Here are a couple of recent locomotive projects, starting off with a bargain Hornby
Class 08 which I'd acquired in railfreight grey. With the body removed, I masked off
the wasp stripes and resprayed with Supadec grey primer, followed by Railmatch blue
from a rattlecan. Once cured, a thinned mix of acrylic rail blue and Tamiya royal light
grey was applied with a chisel brush using down strokes, and weathered using the IPA
bleaching method with a splash of Tamiya black. The loco I chose needed and extra box
on one side, so I made a silicone mould and produced one in fast cast resin, which now
needs painting and weathering to match. It will be fitted with an EMGS kit of Gibson
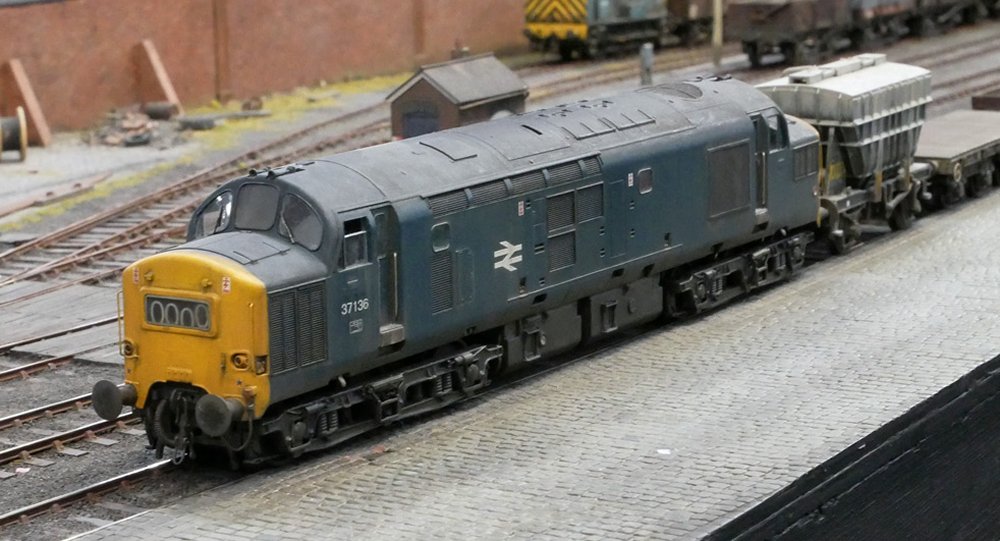
wheels. The second loco is a Bachmann Class 37 in large logo livery, converted to EM
gauge and weathered using the same techniques. There will be more images of these two
when they're finished with buffer beam pipework and Smiths screw couplings.
Here are a couple of recent locomotive projects, starting off with a bargain Hornby
Class 08 which I'd acquired in railfreight grey. With the body removed, I masked off
the wasp stripes and resprayed with Supadec grey primer, followed by Railmatch blue
from a rattlecan. Once cured, a thinned mix of acrylic rail blue and Tamiya royal light
grey was applied with a chisel brush using down strokes, and weathered using the IPA
bleaching method with a splash of Tamiya black. The loco I chose needed and extra box
on one side, so I made a silicone mould and produced one in fast cast resin, which now
needs painting and weathering to match. It will be fitted with an EMGS kit of Gibson
wheels. The second loco is a Bachmann Class 37 in large logo livery, converted to EM
gauge and weathered using the same techniques. There will be more images of these two
when they're finished with buffer beam pipework and Smiths screw couplings.
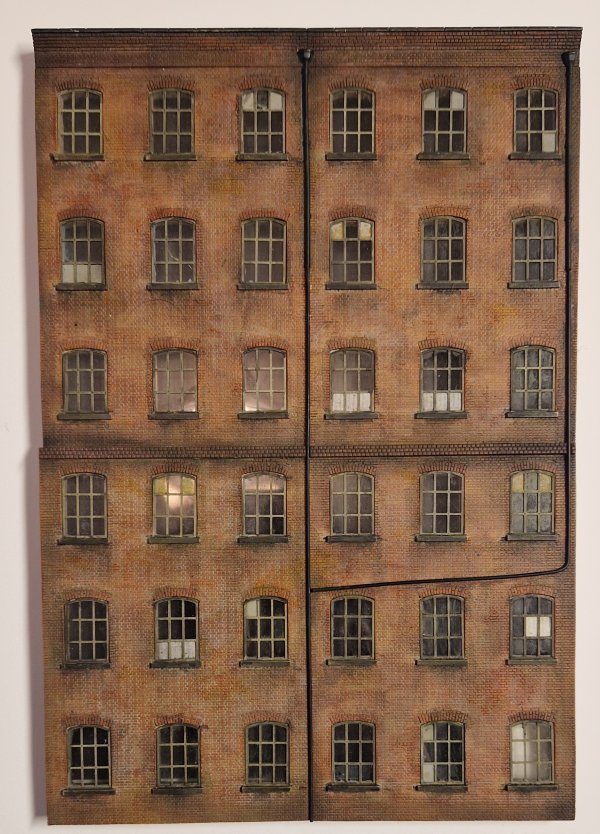 A low relief industrial warehouse with some grime and decay, which started out as 4
modified Bachmann sections tweaked with extra Wills brick details and drain pipes
added. The brickwork was repainted and weathered in layers using the isopropyl
alcohol bleaching technique (as mentioned last month), followed by layers of washes
using several shades of Archive X grey grime and engine black, and some mossy green
and yellow tinges to show moldy moss growth. To finish, some light airbrush weathering
with a mix of Tamiya black and dark grey cut with 99% isopropyl alcohol to thin the paint.
A low relief industrial warehouse with some grime and decay, which started out as 4
modified Bachmann sections tweaked with extra Wills brick details and drain pipes
added. The brickwork was repainted and weathered in layers using the isopropyl
alcohol bleaching technique (as mentioned last month), followed by layers of washes
using several shades of Archive X grey grime and engine black, and some mossy green
and yellow tinges to show moldy moss growth. To finish, some light airbrush weathering
with a mix of Tamiya black and dark grey cut with 99% isopropyl alcohol to thin the paint.
 Pete and I had a lot of talks about controllers and he advised me to get a Pulse Width
Modulation controller, saying it lets the shunters crawl along at very realistic slow
speeds. I picked up a controller kit (search PWM controller on ebay) and assembled it, and
it works very well. They are very reasonably priced so I will no doubt pick up a couple more.
Pete and I had a lot of talks about controllers and he advised me to get a Pulse Width
Modulation controller, saying it lets the shunters crawl along at very realistic slow
speeds. I picked up a controller kit (search PWM controller on ebay) and assembled it, and
it works very well. They are very reasonably priced so I will no doubt pick up a couple more.
 Some readers may be interested to know I'm a full-time professional model maker, producing
exact replicas of the Star Wars models which were used for filming in 1976 by Industrial Light
and Magic. My models are made using the original donor kits ILM used back then in Van Nuys,
Califilornia. A lot of the parts are still available like the trusty old Airfix Saturn V rocket
kit, used for the side engines of the Y wing model.
Some readers may be interested to know I'm a full-time professional model maker, producing
exact replicas of the Star Wars models which were used for filming in 1976 by Industrial Light
and Magic. My models are made using the original donor kits ILM used back then in Van Nuys,
Califilornia. A lot of the parts are still available like the trusty old Airfix Saturn V rocket
kit, used for the side engines of the Y wing model.
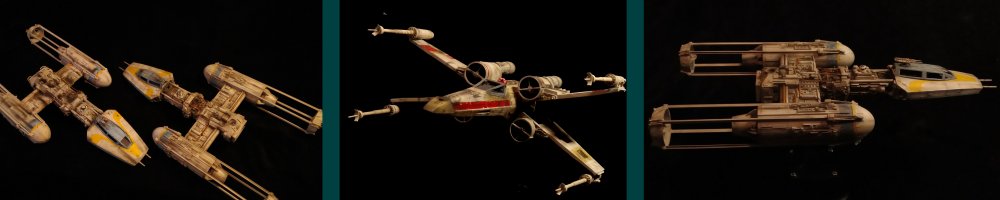 There are a multitude of Tamiya, Airfix, Hasegawa, Esci and Revell kits they cannibalised
and stuck all over the models. ILM call them 'geeblies' - parts stuck on to imply form and
function of a fictional space ship. These are all painted and weathered to look exactly
like the original models used in the film. I meticulously copy the weathering - stain for
stain, ding for ding, using Archive X paints which are reproductions of the Floquil Model
Railroad paints of the 1970s with the same hues, but acrylic not enamel.
There are a multitude of Tamiya, Airfix, Hasegawa, Esci and Revell kits they cannibalised
and stuck all over the models. ILM call them 'geeblies' - parts stuck on to imply form and
function of a fictional space ship. These are all painted and weathered to look exactly
like the original models used in the film. I meticulously copy the weathering - stain for
stain, ding for ding, using Archive X paints which are reproductions of the Floquil Model
Railroad paints of the 1970s with the same hues, but acrylic not enamel.
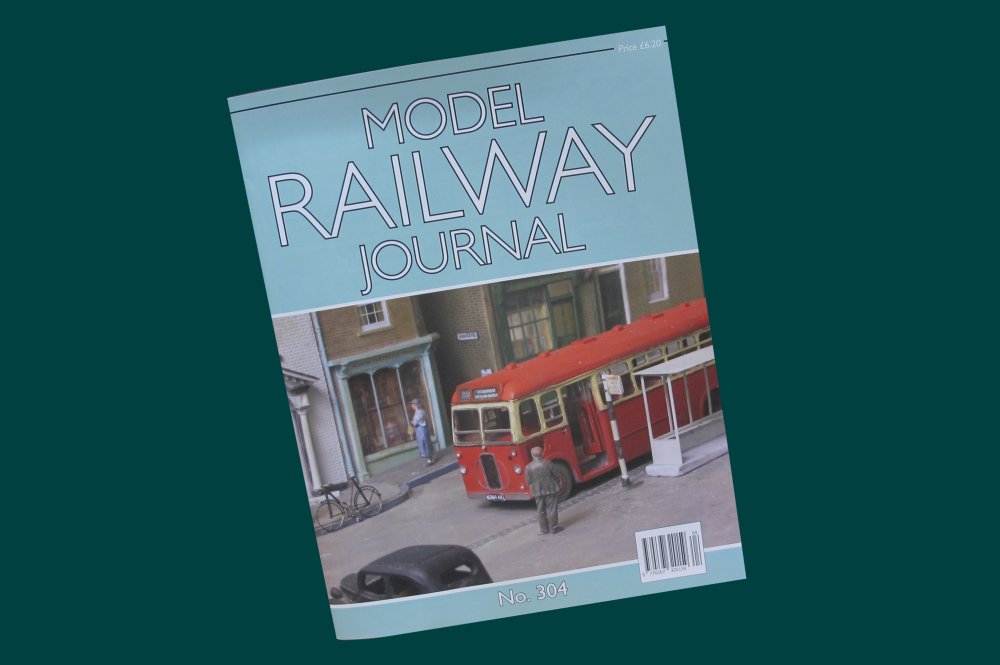 The latest edition of Model Railway Journal (issue 304) features a couple of articles from
the emgauge70s modellers - Freewheeling by Kier Hardy, and The Perfect Class 25 by Karl Crowther.
The latest edition of Model Railway Journal (issue 304) features a couple of articles from
the emgauge70s modellers - Freewheeling by Kier Hardy, and The Perfect Class 25 by Karl Crowther.