*********************************************************************************************************************************************
MARCH 2022 UPDATE
*********************************************************************************************************************************************

KIER HARDY

4-TC set 416 on the flyover at Hornsey Broadway being propelled by Electro-Diesel Class 73
E6018 on a charter service. These Trailer Control vehicles were built in 1966 for the
Bournemouth services, working with either 4-REP units on the 3rd rail or Class 33/1, 73 &
74 on non electrified routes. The last set to wear this livery was number 424, being
repainted into blue/grey livery to match the rest of the fleet in November 1970.

Captured behind BRCW type 3 (Class 33/1) D6511 from the Langham Lane fleet. This shows the
unit on test before the weathering and etched badges were applied.

Converted to EM Gauge using Gibson 12mm DMU disc wheels, whilst still retaining the central
section sprung electrical tabs which act on the underside of the internal circuit board for
stability. With no coach lighting required, the multi-pin connectors have been removed and
replaced with standard Kadee number 5 buckeye couplings. Folded black paper is fitted
between the corridor connections to fill the gap. This Bachmann/Kernow model has the brake
blocks set to OO Gauge, so gently squeezing the bracket (in a pair of smooth jawed pliers),
squashes them out to line up correctly with the EM wheelsets.

This pair of green Bachmann mark 1 coaches were salvaged from the Eastwell works scrap sidings,
for occasional use within some of the Hornsey formations to add a bit of variety to the existing
coaching stock fleet. In the early 1970s there were still a handfull of green liveried mark 1
coaches around. The steel roof sheets were butt welded with the join being barely visible (unlike
the ribs produced on the Bachmann model in the background). The end platforms were removed from
above the corridor connection quite early on in the lives of the mark 1 coach, leaving a pair of
brackets visible. These webbed triangular brackets have been printed by Jonny (both left & right
handed) but were difficult to position by eye without a lot of faffing around. The roof ribs have been
shaved off with a fine chisel ended blade, and the rainstrips replaced with styrene strip.

Fortunately, when chopping the step off some of the Bachmann mark 1 coaches, it leaves a slot
into which a revised print can be fitted with the brackets already in place. Foot steps are
also being added at this stage to the end of the coach on the bufferbeam.

There are a lot of mark 1 coaches on the layout and it may take a while before this process
is completed, so priority will be given to the end coaches where the detail modifications will
be more noticeable.

Fresh from Jonny's printer come these 10ft containers, to fill some of the gaps in the
freightliner rake. I've also taken the opportunity to print additional number panels for
the existing containers which didn't have roof identification (as seen in the
background awaiting toning down with a pencil).

Seen planted on a inner flat with Pete Johnson's other open containers.

These bollards are another recent 3D print, featuring sunken panels and arrow to aid
with the decorating, with just a pen tip being run around the recess. This detail work around the
junction of Bridge Street and Market Street has inspired me to finish off after the section had
been separated and rejoined with a gap. Fence panels, street names and road markings have all
been reinstated and the area blended back in.

Other recent 3D prints which have been painted and planted on the layout include this selection
of benches and storage boxes, as well as a permanent way ganger's trolley. Free downloads for
these featured prints can be found here on
Thingiverse

Here's a few more snaps capturing the visiting motive power on recent
running sessions, starting off with type 2 BRCW 5409 from the Shenston Road fleet, at
the head of a coal train heading for East London.

Another pair of Greg's Heljan Class 27s with D5389 leading a rake of 16 ton mineral wagons.

English Electric type 4 - D236 at the head of a train of Carflats

Here's a couple of images featuring some of the Eastwell TOPS fleet, starting off with 33022
hauling a empty northbound cement train formed of Cemflo wagons.

Another cement train formed of Presflo wagons with 40136 in charge. This is a double
motored Lima model, utilising Hornby Railroad power bogies.
*********************************************************************************************************************************************

STEVE CARTER

A switch has been made from modelling projects to begin preparing the layout real estate. Six 3'
x 2' baseboard kits were obtained from Tim Horn and duly constructed. Arranged in staggered
'portrait' fashion to accommodate curved running lines, they will form a 12' scenic section.
As the layout is to be set in an urban environment then this uneven frontage will form a
framework for a street pattern or alternatively could be filled with scenic modules. The
rear non scenic section will be constructed later and will feature a traverser.

Work has also got underway constructing necessary electronic controls. Two separate hand held
DC controllers will plug into a central module housing all necessary electronics such as this
control board. Each controller will feature short circuit protection and all switching /
interlocking will be done within the central module rather than in the handsets.

Each handset will provide power for up and down lines but have been designed such that they
are interchangeable and will 'sense' to which line it has been connected with the direction
LEDs showing either a green or orange aspect. The red LED is to indicate a short circuit
whilst the toggle switch will change the direction of running or shut off the track feed
when in the central position.

Each handset measures 100 x 50 x 40mm and will only house a limited set of components. This
particular box assembly has been chosen to make the wiring up as easy as possible.
*********************************************************************************************************************************************

GREG BROOKES

In preparation for a forthcoming publication, I've finally finished this Hawksworth Staff Van,
spotted away from home at Hornsey Road Depot. Originally built to diagram D133 in 1950 as a
Brake 3rd (lot no 1732 11) this vehicle was observed in many locations around the Western Region
in use as a staff van.

This was originally featured on the May 2020 Update page, awaiting suitable ventilators
(3D printed) to fit into the bodyside, as well as finishing other small details such as
steps and handrails to represent QPV number DW150401 (ex-GWR2233) in use with the CCE department.
*********************************************************************************************************************************************

KARL CROWTHER

During the last month, attention has turned to building the station platforms, or at least the
edgings. John Elliott very kindly cut these in 2mm MDF on his laser. Essentially these comprise
a ‘backing’ onto which an appropriate ‘face’ is built up using plastic sheet and section. The
cardboard strip on the rear in this photo is one of the joining pieces to connect the individual
MDF strips to make up the full length of the platform. The idea is that having the location of
the platforms clearly indicated, should assist with operating sessions. The ‘missing’ bit of
the ramp in the nearest platform is where the signal box will be sited.

As can be seen at Kentside, I’ve decided to replicate the concrete platform edging that was adopted
for the original layout (as deployed at several stations in this part of the world). Thus onto the
MDF was first glued strips of 15 thou sheet (using Evo-Stik Time Bond contact adhesive), suitably
pre-scribed to represent the vertically stacked concrete panels. The uprights came from 80 x 120
thou Evergreen strip (cut using the NWSL ‘Chopper’ for consistency), while the edging panels were
cut from 60 thou sheet. Kendal, by contrast, will have a mixture of brick and stone, taking the
cue here from Lakeside.

For the platform surfaces themselves, the plan is to use mounting card, which matches the depth
of the edging panels. The total platform length at Kentside will just accommodate a 5-coach train,
and note they’ve been slightly staggered to fit around the adjacent pointwork. Pedestrian access
between the platforms will be via a subway connecting the two, a bit like Grange-Over-Sands and
also providing access to the foreshore. Note the signal with the two subsidiary arms will
eventually be mounted on the Up platform.

Also this month, attention has been turned to the ‘facsimile’ signals that will be used in the
offstage areas of the fiddleyard. These were first drawn up in Coreldraw and then laminated.
Next, a 3mm diameter piece of brass tube was used to make a punch to open out the lenses. The
images were then cut to size and secured to the ‘frames’ with double-sided tape (the supporting
frames themselves were made up from 60 thou plastic sheet). The lens holes in the sheet were
now drilled to 2.5mm and then carefully enlarged to give a force fit for the 3mm LEDs. Signals
of this type are based on an idea I ‘borrowed’ from Mike Norris, so thanks to him for his ingenuity!

From the rear you can see the positive legs of the LEDs connected via a 1000 Ohm resistor to a
common positive length of copperclad strip (as these are 3V LEDs you need to include an appropriate
resistor to protect them when connected to 12V DC). Wires to the common positive, and the negative
inputs from the relays remain to be attached. It will be interesting to see how these work out
once installed onto the layout – hopefully next month…….
*********************************************************************************************************************************************

PETE JOHNSON

Interior detail for the Burtons building has recently been completed. A freelance
finishing/packaging machine is being checked on the first floor.

On the floor above the mis-formed biscuits are being removed from the conveyor by the checking team.

Above that one of the mixing machines is being reloaded.

In the office on the top floor the record keeper is having a spot of bother
with late returns from production.

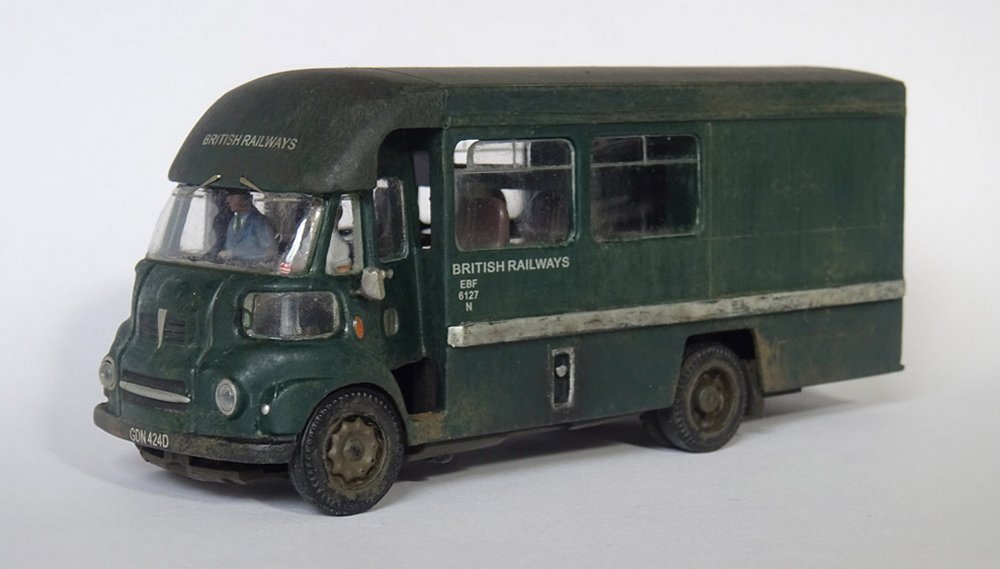
The alternate shell for the radio-control Leyland crewbus has also been completed, and
will allow it to appear in sequences back to 1966.

A new project that is now ready for weathering is a 25/1 for the 1976-1979 era. 25 047 was
in Derby during the spring of 1976 when the end doors were sheeted over, but the headcode
blinds were allowed to remain. The loco continued to carry a 0000 code right through
to withdrawal in late 1980. The later (larger) style of datapanel, which first appeared
during 1975, was also applied. The model is based on an old Hornby loco with a 5-pole
Ringfield that had been in the cupboard for years.
*********************************************************************************************************************************************

HYWEL THOMAS

One project that has spent a few years sat in its original box in the cupboard was a Dapol
class 122 single car DMU. The only example of a DMU likely to turn up at an obscure outpost
like Morfa Bank in 1972 was the WR route learning car, DB975023. At that time it had not
long been renumbered from DB975073, a number it carried in error for a few years. Starting
life as W55001, and entering the departmental fleet in 1969, the route learner was a common
sight around the WR for a number of years before moving further afield. The body of the Dapol
model was a good representation of the real thing but the interior needed some work, starting
with the removal of most of the seating.

As I use DC control, the speaker cabinet in the guard’s compartment wasn’t needed and so it was
removed and replaced with a simple cover over the resulting hole. This also involved some surgery
to the metal casting attached to the chassis, again with the redundant metal removed. Here we can
see new seating (salvaged parts from the inspection saloon conversion a few months ago) fitted
in the guard’s section for its new route learning role. I was disappointed with the engineering
on the drive mechanism and had to dismantle the unused chassis and solidly fix the too-sloppy
drive parts to the cardan shaft just to get it to move, something you really shouldn’t have to
do on a modern day RTR item.
Once I’d got the railcar actually running successfully I moved on to the other end of the
interior. The floor on the Dapol model is around 5mm higher than it should be to clear the
mechanism. In the route learning conversion the three rows of remaining sets were slightly
tiered so that the drivers could see the route ahead. As I wasn’t going to use the interior
lighting I didn’t have to put too much detail into the seating and, again, used salvaged
seating parts from the earlier conversion. The gaps left after removing the other seats were
filled with plastic sheet.

The figures were modified from the Bachmann 1970s station staff set, taking on a new lease
of life after some major surgery. The two partitions have been fitted further down the saloon.
Showing the saloon from the other end with even more surgery apparent on the poor station
staff we see here. These characters will be barely visible in the former guard’s compartment.
Two fire extinguishers were prominently visible through a window and are
made of some carved sprue. Two lockers occupy the centre compartment and some
tables in the other. A few ModelU orange hi-vis jackets add a splash of colour.

As the completed unit rolls past the photographer before stopping short of the Morfa Bank
headshunt we can see a few drivers admiring the forward view of the line ahead.

The unit, carrying the set number B101, correct for the 1972-era, has slowed to a halt at
Morfa Bank before reversing and heading further west on its tour of obscure freight lines.
The bent handrail, only spotted on the photograph, has now been put right!

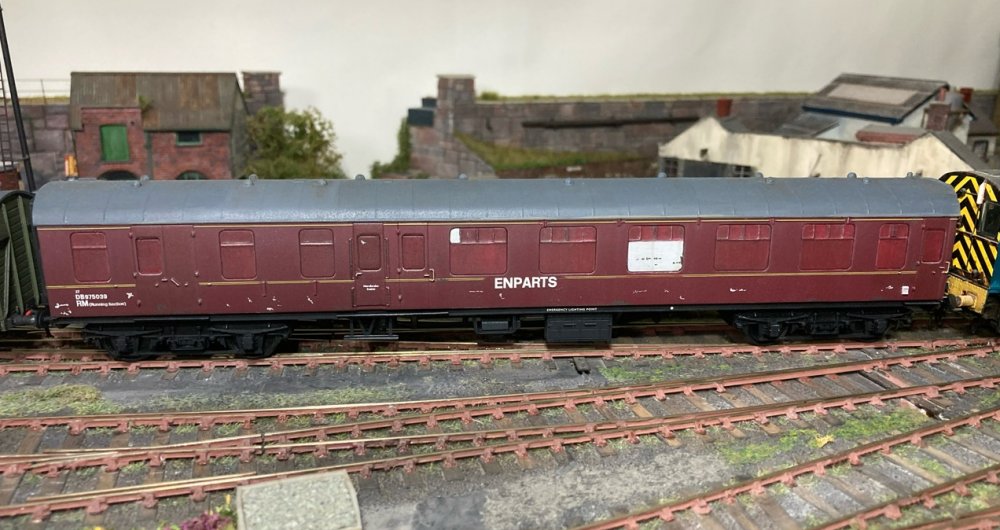
A rather quicker project recently completed was one of the batch of eight BR Mk.1 BSOs converted
to Enparts vans by the WR in 1969. This was a stock Hornby model, bought cheaply, and retained
its maroon livery until at least 1974. The others carried a mix of liveries but the Enparts
markings were consistent throughout. Carrying the number DB975039, the transfers were created
on the computer and on this example all the windows had been either painted or plated over.

Here we see the van being shunted into the yard heading for Landore. Some of the replacement
doors on conversion were painted maroon but remained unlined.

Another relatively quick project, this time using the Bachmann BR standard planked van, was
this tool van for the rail positioner set. Modifications were minimal and involved removing
the label boards from the end, adding a siren to the roof (and some suitable switches near the
wagon number) and two oddly placed lamp brackets above the doors. The yellow panels on the
original were quite crudely painted, while the markings were created using
several photos of the original van.

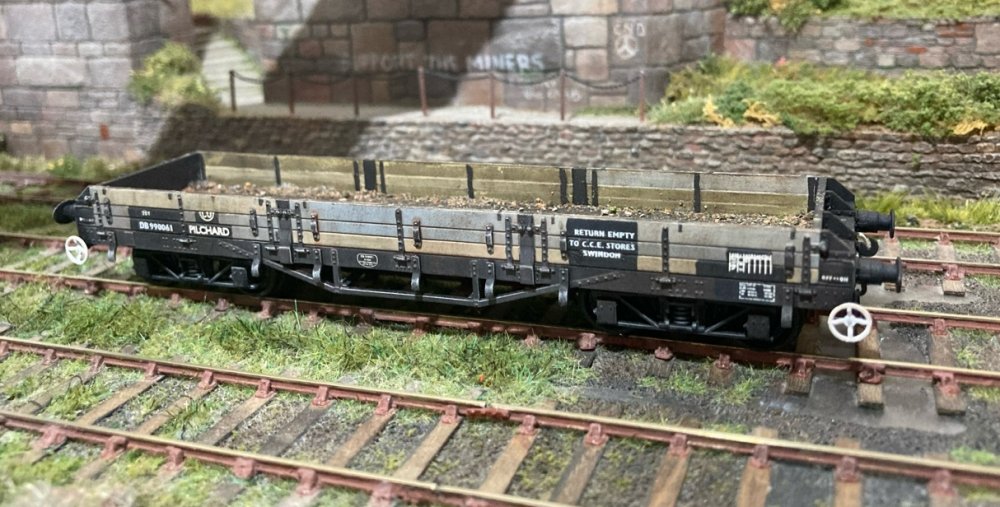
Finally this month an example of the newly introduced Oxford Rail Pilchard. These were very
much a North Eastern type but one did make it to the WR and worked out of the CCE sidings at
Swindon to various parts of the WR over the years. When photographed at Barry in the 1980s
it even sported half a WR ‘CO’ roundel so this was included in the repaint. Some weathering
and old ballast inside completed the reworking of this very nicely moulded model. The EM
conversion wasn’t, however, straightforward as the wheel sets featured a shorter axle and
slightly smaller diameter wheels. I used the very useful H&A Models axle drill to increase
the depth for the longer axles and removed plastic from the underside to take the extra
diameter of the Gibson wheels.
*********************************************************************************************************************************************


