*********************************************************************************************************************************************
NOVEMBER 2021 UPDATE
*********************************************************************************************************************************************

KIER HARDY
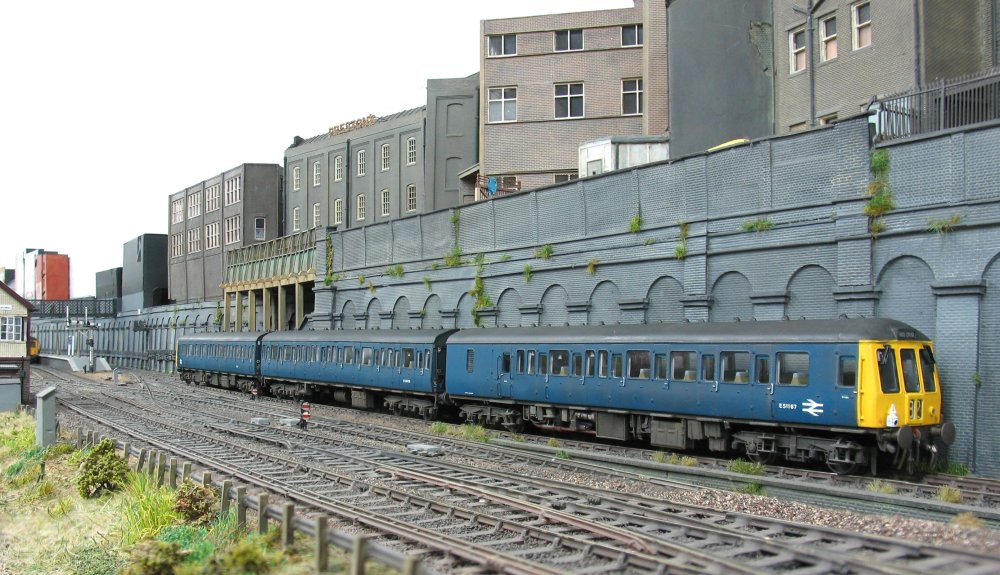
In 1958 BR Derby works built twenty 3-car DMU sets for the ex-Great Eastern suburban services
to Hertfordshire and Essex, otherwise known as Lea Valley sets and later Class 125. With their
Rolls Royce engines and hydraulic transmission they matched the performance of the electric
multiple units working out of Liverpool Street station. When these routes all became electrified
during the 1960s, the 20 sets were transferred to operate the peak-hour inner suburban services
from Kings Cross and Broad Street. The units were allocated to Stratford depot throughout their
lives, being maintained and serviced there even after transfer. Just after the ex-Great Northern
electrification scheme was completed in 1976, these units were withdrawn, being non-standard
orange star coupling code and unable to work with other DMUs.
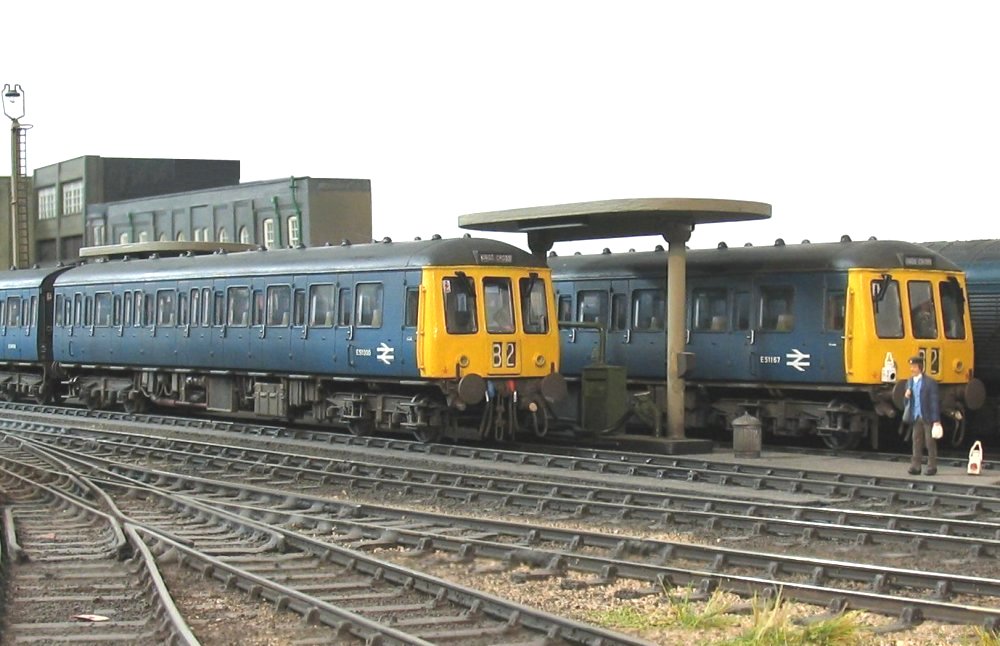
The power cars (DMS E50988-E51007 & DMBS E51154-E51173) were identical below the solebar (with
the exception of access footsteps). Their outward appearance was very similar to the Class 116 3-car
units, the main visual difference being the control systems and lack of first class accomodation.
DMS E51000 is joined at the fuelling point by DMBS E51167.
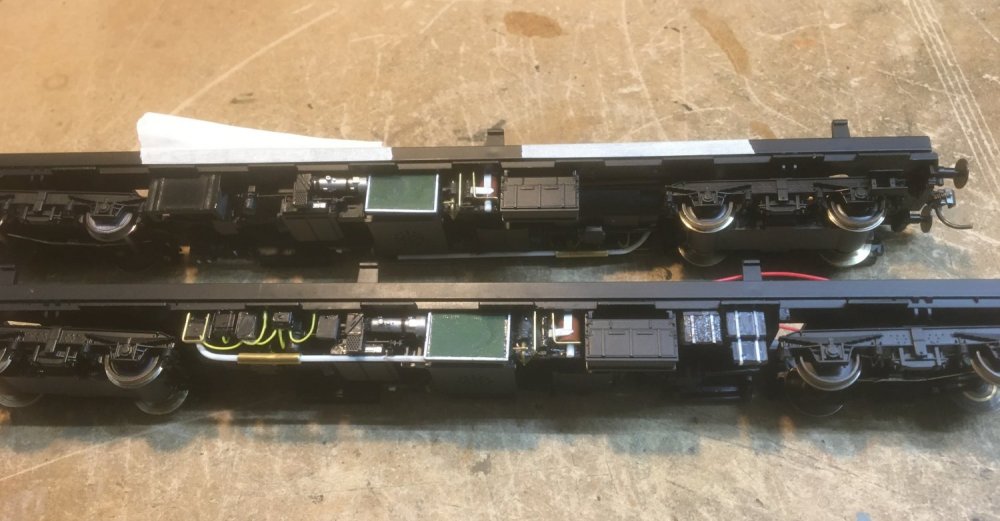
This type of DMU has been on the 'to do list' for Hornsey Broadway for quite some time, with
initial conversions on the Lima Class 117 model being considered. However for this project, a
Bachmann Class 117 has been the donor model with everything except the battery boxes being
removed and new components scratchbuilt to suit the configuration of the Class 125. The units
had a much larger radiator and were similar to the semi-automatic St Pancras Class 127 DMUs.
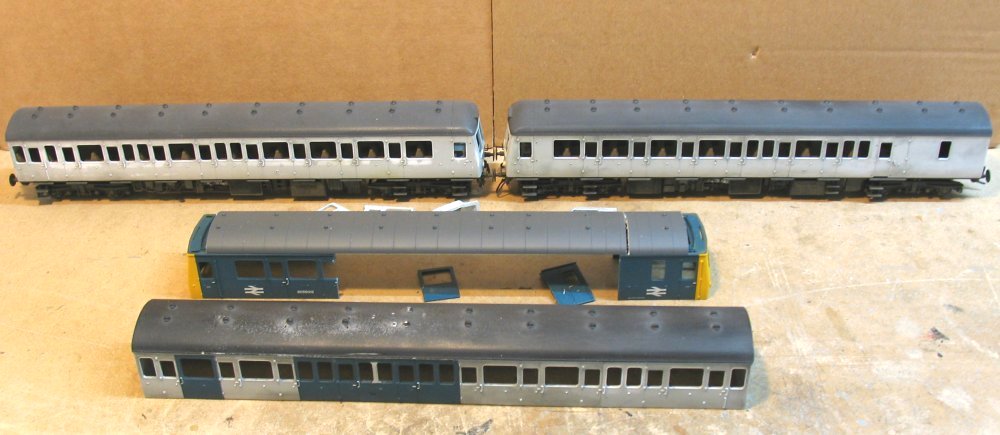
Bodywise, the DMS & DMBS required very little modification, with just the cab roof and headcode
box being cut off and replaced with a destination box from a Dapol Class 122. The centre car
required the most amount of work, with the lavatory and seating bay configurations being removed
and replaced with other parts from the Dapol body.
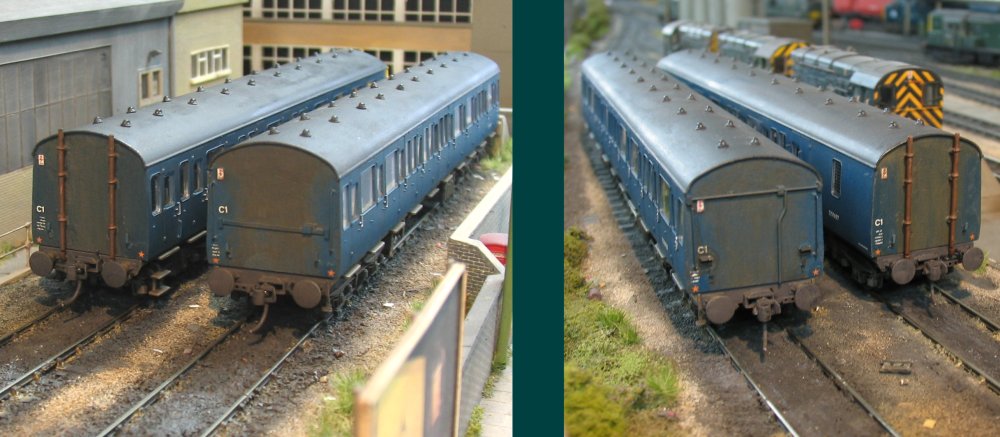
Views showing the inner ends of the TS (E59449-E59468) featuring the lighting switch and control
lever on one end, and the standard emergency communication layout on the other end. Kadee
number 5 buckeye couplings have been used to couple the units together - a standard used on all
other DMUs and coaching stock on the layout which makes for easy separation and maintenance.
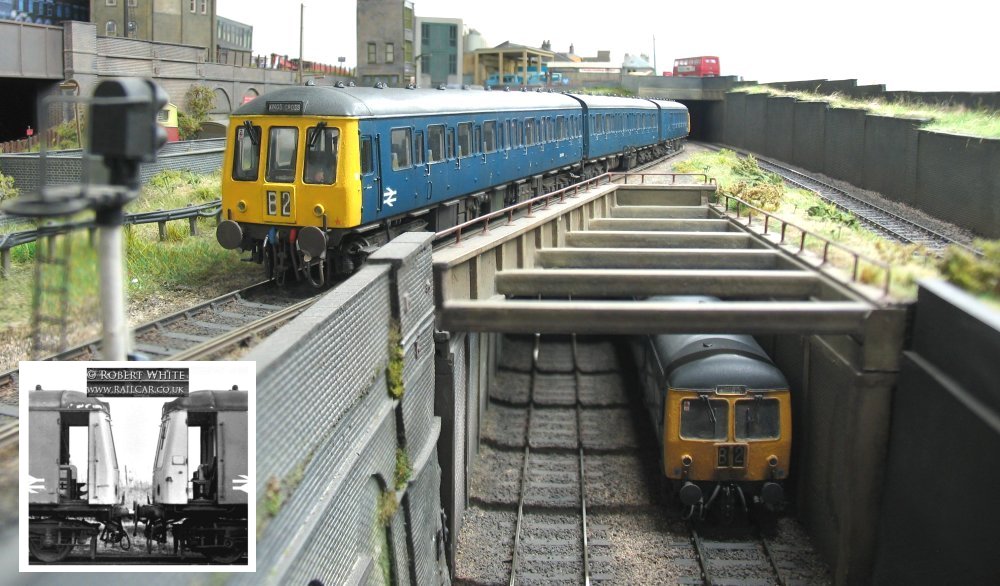
There was a coolant filler cap on both sides of the driving power cars when built, but by the time
they arrived on the GN they had been modified with two on the drivers side only. Coolant residue
on the bodyside was a common sight, highlighting the 2 hatches on this side. At the time of this
modification, yellow square plates were affixed to the A pillar just ahead of the driver's door,
very noticable when wearing small warning panels but later overpainted (represented by squares
of transfer paper) and hardly visible in this shot of the unit as it would have been in 1970.
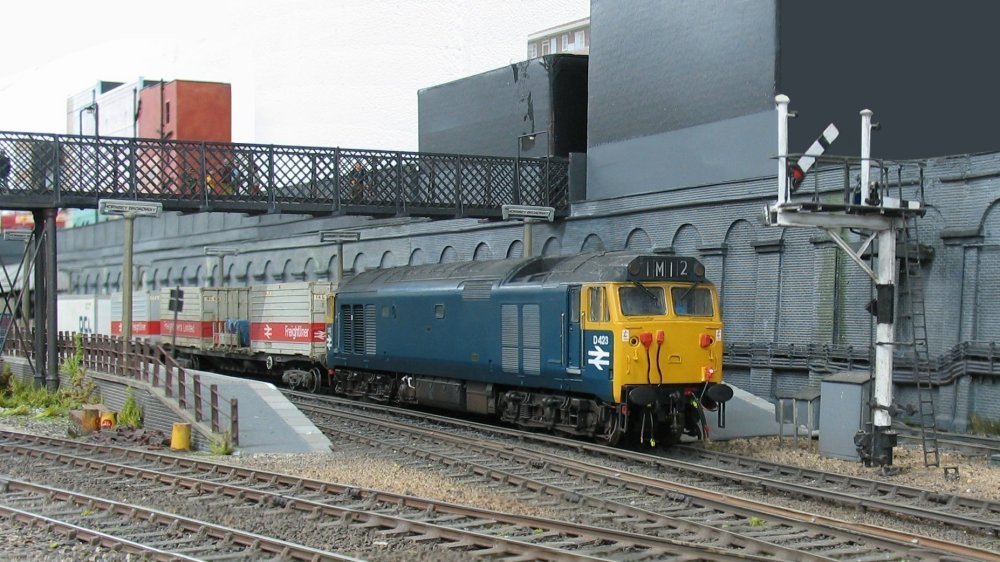
D423 heads a freightliner service through the station (displaying incorrect headcode). The
regular running sessions on the layout give the opportunity for visiting motive power, in this
case a Class 50 from the Shenston Road fleet.
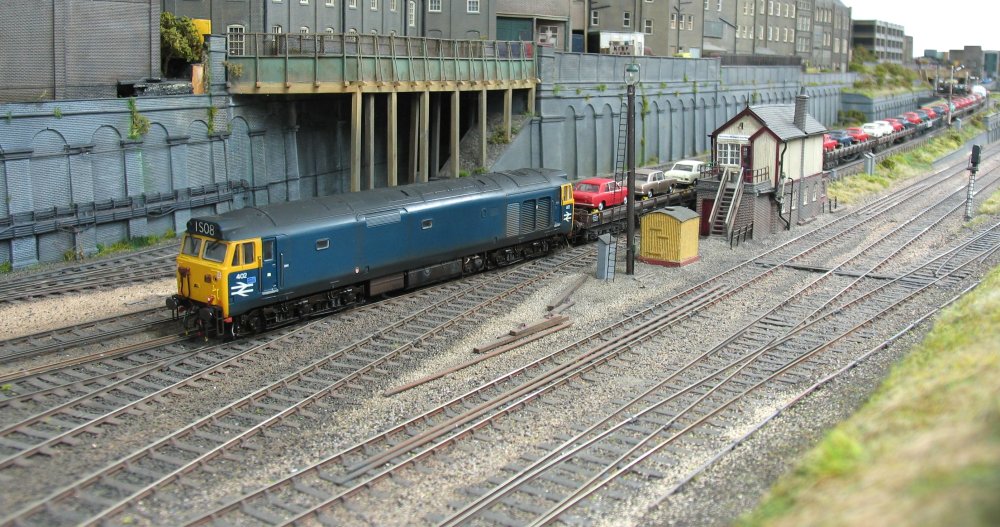
Another of Greg's Class 50s, this time number 402 heading north with a train of Cortinas from Dagenham.
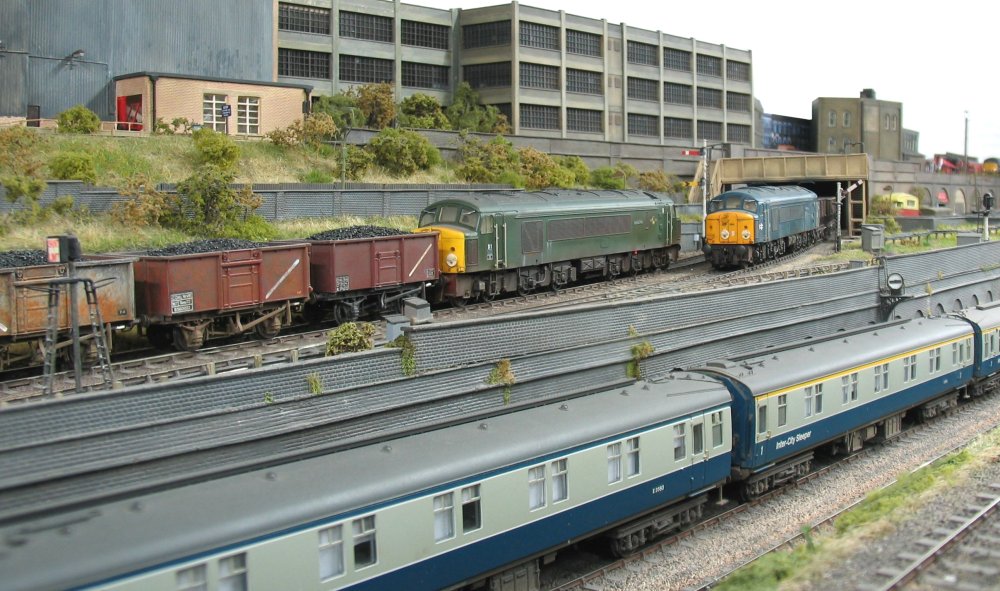
A pair of Shenston Road Class 44s are captured in this scene. Green liveried D1 Skafell Pike is
held at the signals whilst D4 Great Gable in blue heads in the opposite direction.
*********************************************************************************************************************************************

KARL CROWTHER
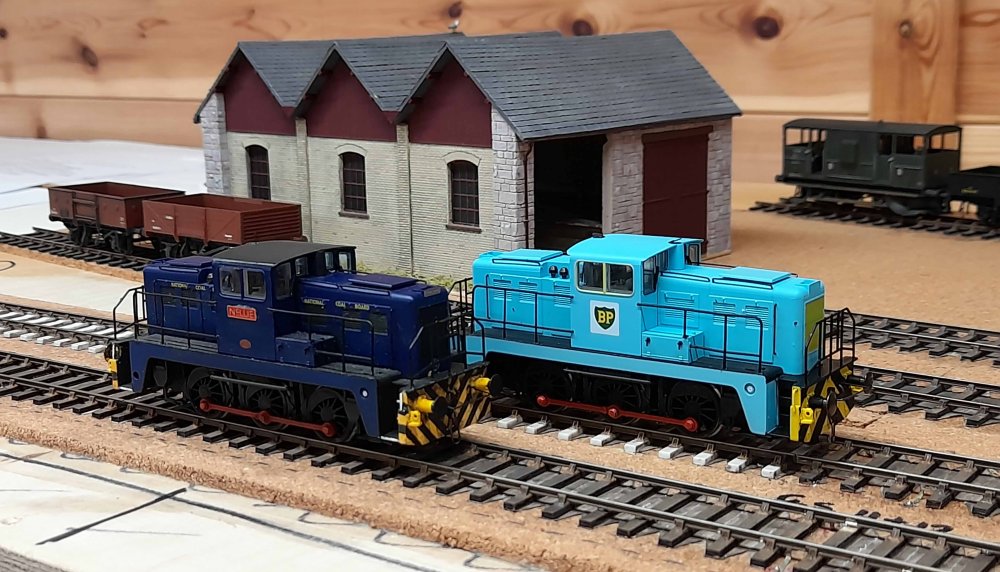
Testing in progress – the Janus diesel featured in last month’s update has now been joined by a
companion! They were built for a friend using the Oxford Rail body with Mike Edge chassis parts.
They employ CSB suspension, with a High Level/Mashima, gearbox/motor combination. Also they’re
sound-fitted, plus a stay-alive circuit. Alas they’ve since departed the layout for their new home.
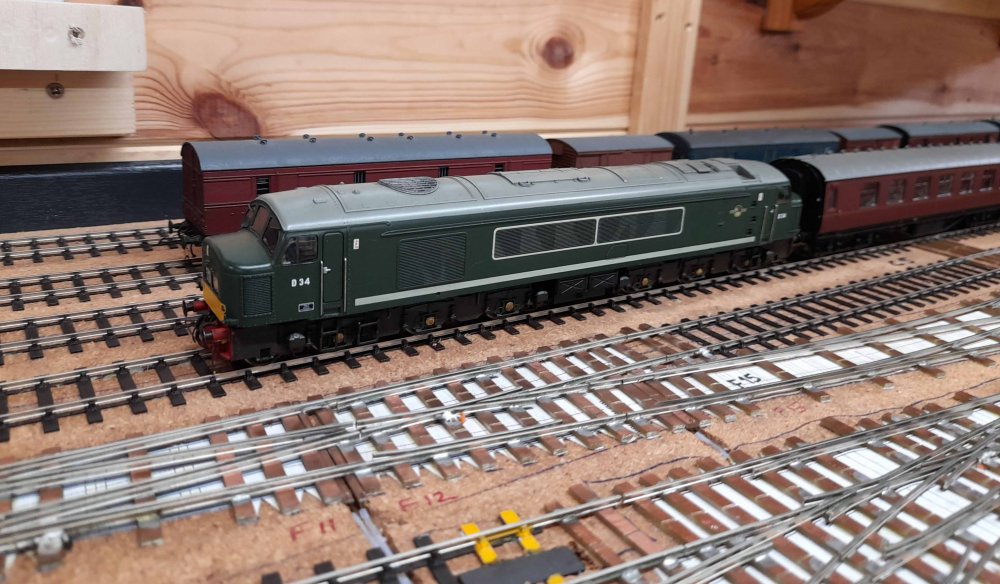
Recently commissioned is this Class 45 diesel which uses the Bachmann model as the basis, with full
springing via the Penbits transmission kit. Quite a bit of work was done to the body, including
various Extreme Etchings parts (glazing, roof fan/grille, body lifting points). The latter are very nice,
but got in the way of the suspension, so quite a bit of the unseen parts needed to be removed for
clearance purposes. For the sound I’ve gone for a Zimo decoder with Digitrains/Paul Chetter sound
project and very convincing it is too. Part of the work on the mechanism involved milling away
sections of the chassis block to fit a pair of decent-sized speakers –a Rail Exclusive’ Big Boomer’ at
one end and a ‘Baby Boomer’ at the other, plus a high power stay alive courtesy of Youchoos.

Good progress has been made in the fiddleyard loco turntable area, with all of the pointwork made
and stuck down, plus the plain track taking shape. It’s given me three further short sidings that will
house DMUs, plus up to three loco storage roads leading off the turntable. The next task will be to
get it all wired up and connected to the control panels.
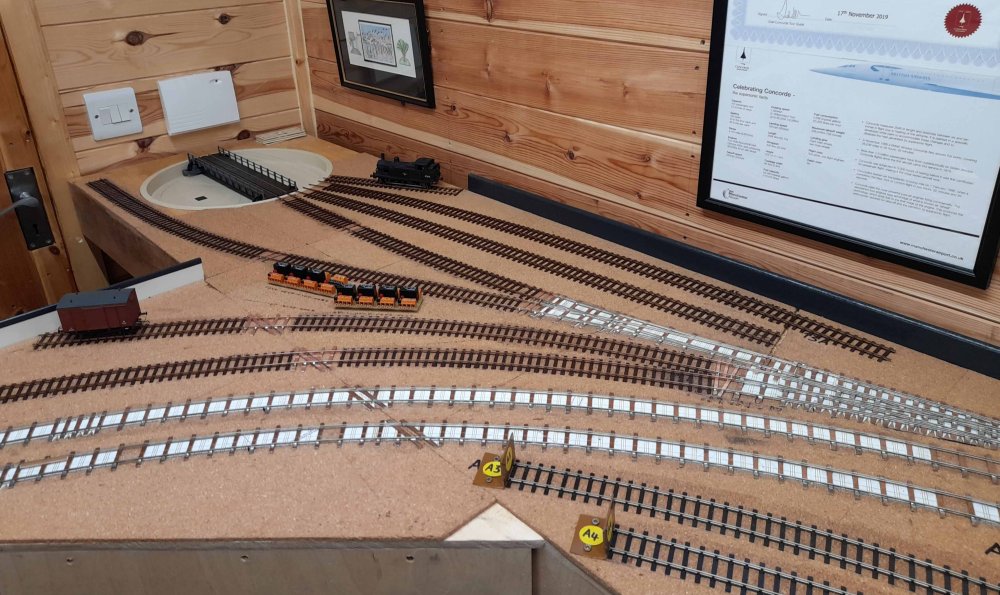
Another view of the turntable area – a case of trying to make use of every available square inch of
space! Earlier in the month a couple of friends came round to do a very first, exploratory operating
session. Overall it was a success, only a number of small issues to sort out, but nothing too drastic.
The Block Instruments worked a treat and there are even a couple of working signals now installed.
There’s another session planned for November (our local EMGS Area Group), so fingers crossed it all
goes well….
*********************************************************************************************************************************************

HYWEL THOMAS
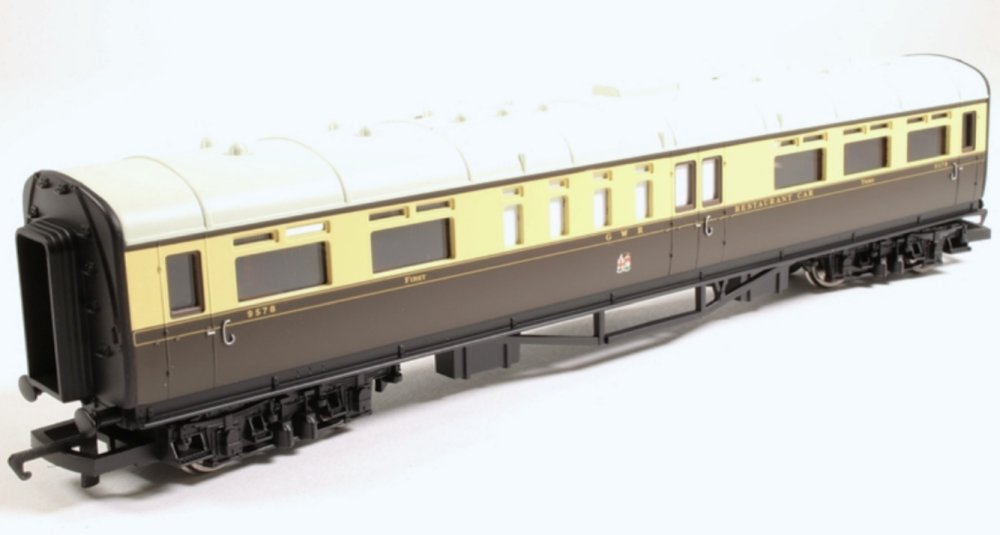
As Morfa Bank is set at the end of a run-down freight branch my opportunities for modelling
coaching stock are rather limited. Having come across several photos of the Reading S&T
inspection saloon in South Wales I decided this was the excuse I needed. The Hornby Collett
Restaurant to GWR diagram H33 is one of their older models, dating from around 1978. Apart
from being of its time in terms of detailing it isn’t a bad model. They were all altered
with deeper windows with different ventilators in 1939 with 9580 becoming a buffet car in
1952 as diagram H58. It was this one that became DW150266 in 1960.
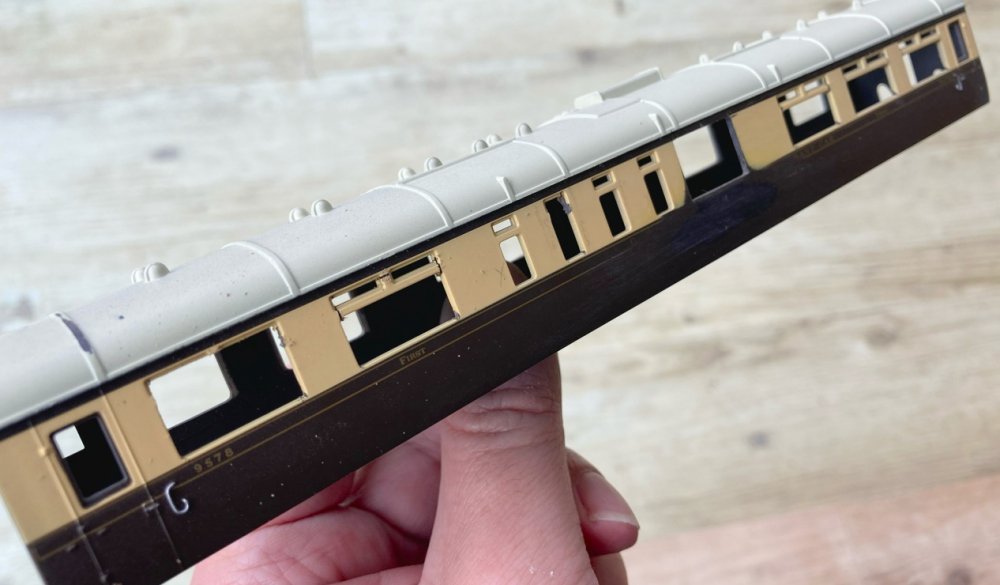
Once disassembled I’ve made a start on cutting out the redundant bits from the existing window
openings. This was very much intended to be a conversion ‘on the cheap’ and so the intention
was to use a selection of old Kitmaster Mk.1 coach window mouldings I’ve had for a while.
These are slightly narrower (by around 1.75mm) than the actual 1939-type H33 windows and also
need to be thinned at the top to reduce the ventilator depth. Another option (which would
involve some extra expenditure) would be the Comet brass sides for the post-1939 window layout.
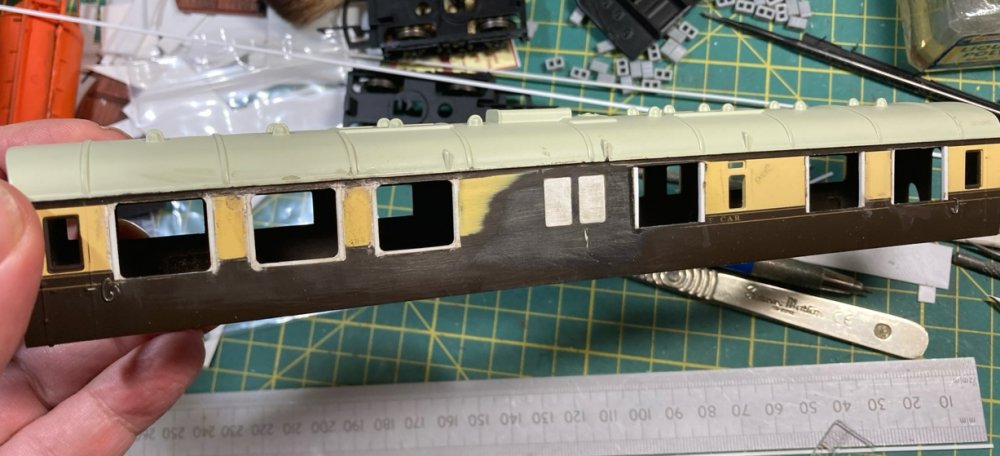
Here we see the existing windows after opening out and modifying for the Kitmaster replacements.
Some of the other windows have been filled in with plastic as the revised H33 layout was slightly
different to the original Hornby set up (and 9580 had been further modified for its days as a
buffet too). The droplights from the double door on one side were carefully salvaged so I could
reuse them for the two new doors that were needed, one each side.
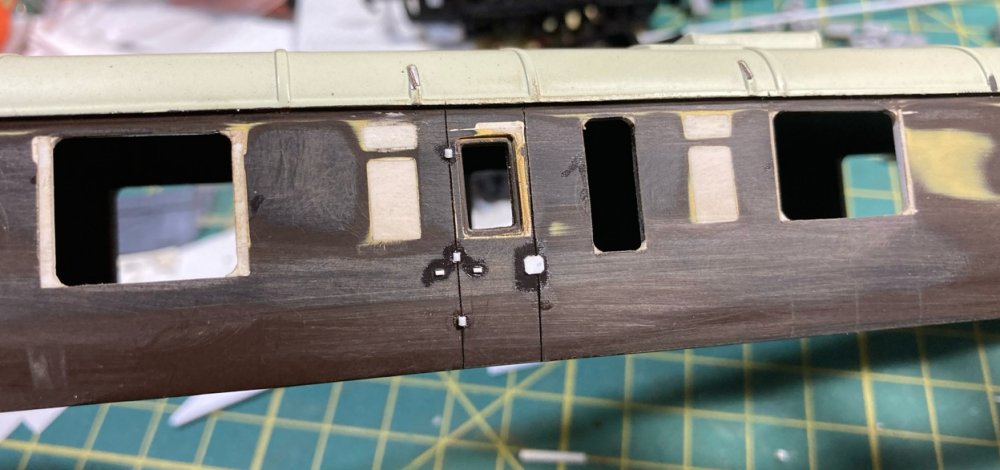
After much filling and sanding we see one of those new doors in place using the salvaged droplight.
The door was scribed using a very useful Revell tool intended for producing panel lines on
aircraft models. The window openings now have radiused corners using small fillets of plastic
welded in place and then filed to shape using a round file to suit the Kitmaster replacement glazing.
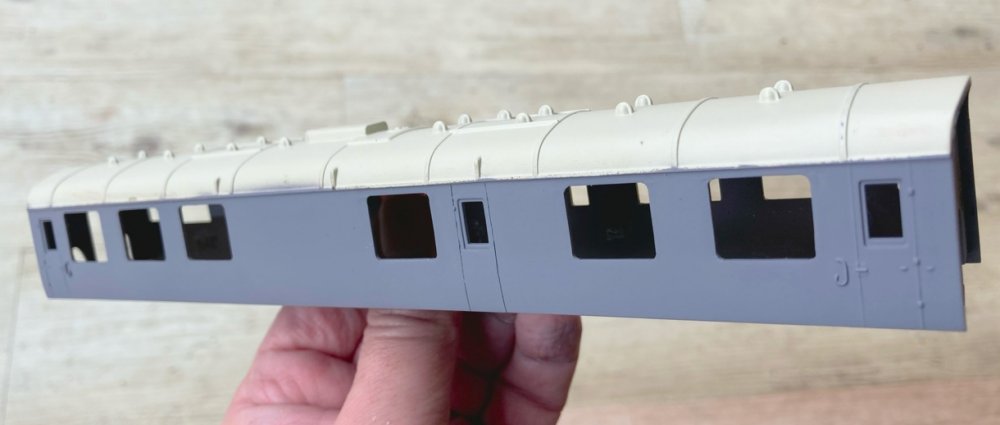
The other side with a quick spray of primer to show up any areas that still needed sanding. Door
details were still to be added once the next stage of sanding was done as that was easier than
risking the detailing being lost. Already the coach looks very different from the Hornby original.
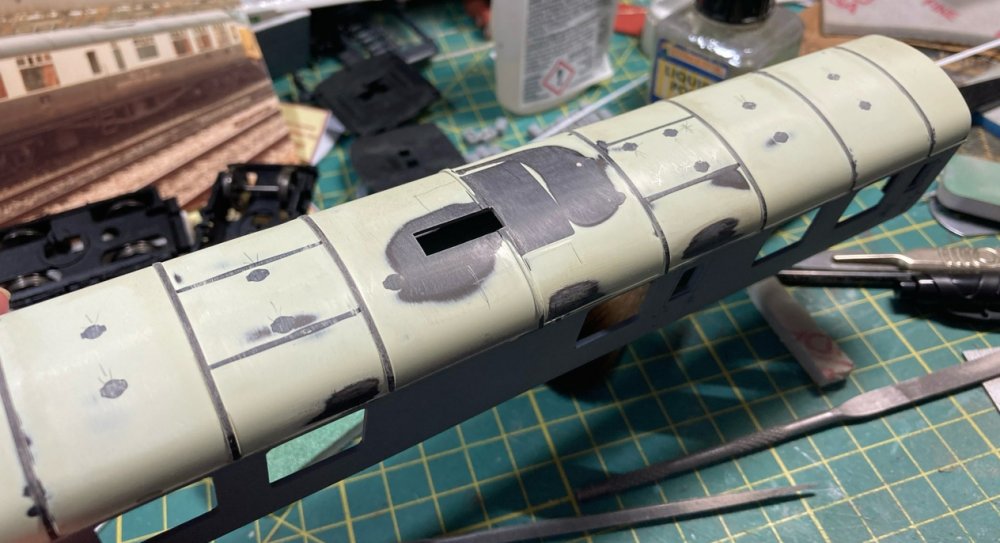
With the sides finished it was time to start on the roof. The moulding up on top is quite crude
and rather prominent so needed to be considerably thinned down. The remaining detail was completely
removed as the various vents over the kitchen area seemed to change several times over the years.
Before spraying with primer to check if everything was smooth the shell ventilator locations were
drilled. Even some of these were in slightly different positions over the life of the saloon.

With the body sides progressing nicely attention turned to the ends. I had considered making
completely new ones but the Hornby examples were a nice fit on the existing sides so I decided to
keep them. On the left we see one with all the details removed. This was done with a combination
of side cutter, sanding blocks and files. The new windows were then marked out, drilled, cut and
sanded until they were the correct size.
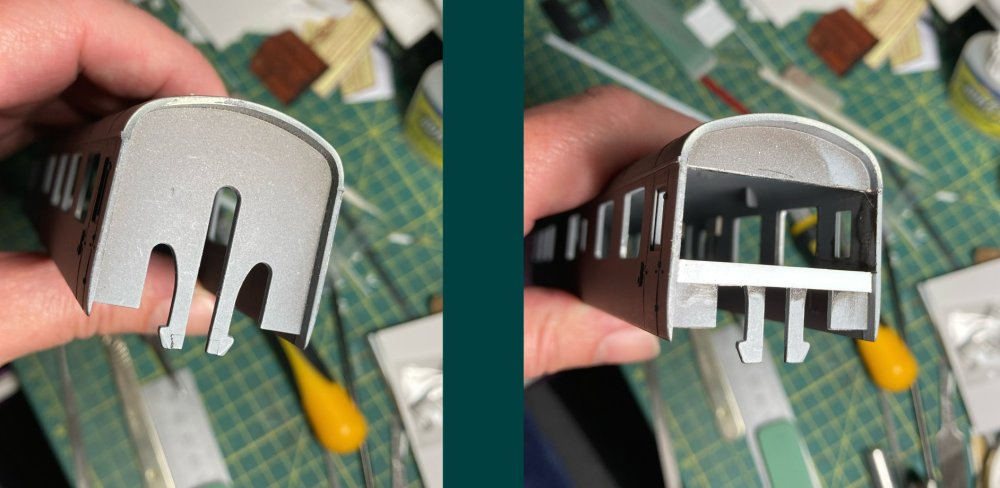
This is the existing Hornby end with the clips that fit into the underframe moulding. I decided to
retain these rather than trying to fit some new system of attachment, which called for some head
scratching! The ends were marked to clear the newly cut observation windows and then 40-thou plastic
strip fillets were cut to fit the existing gaps between the clips. These were glued in and a long strip
fitted behind and another in front and everything left to thoroughly dry overnight. The next day the
previously marked section was removed using a saw and filed to shape leaving the clips still functioning.
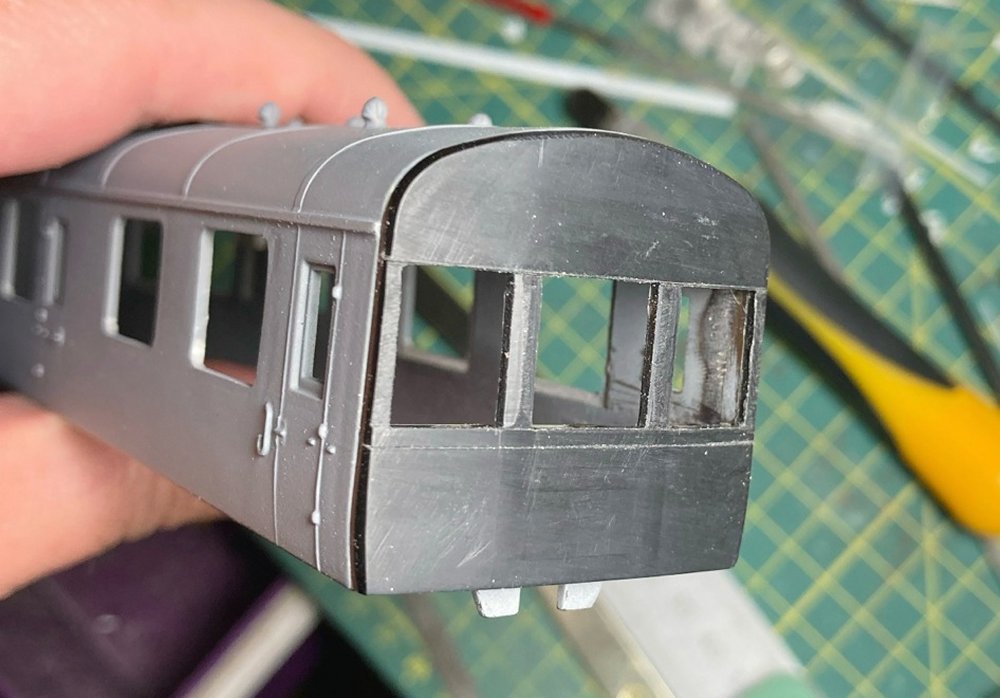
The small T-shape moulding on the rear of the Hornby ends that slides into the coach moulding would
have found itself in the centre of the middle window and so it was cut off and repositioned lower
down. This allowed the ends to slide onto the body as before. Once everything was lined up they were
glued in place. The base of the clips can be seen below the end.
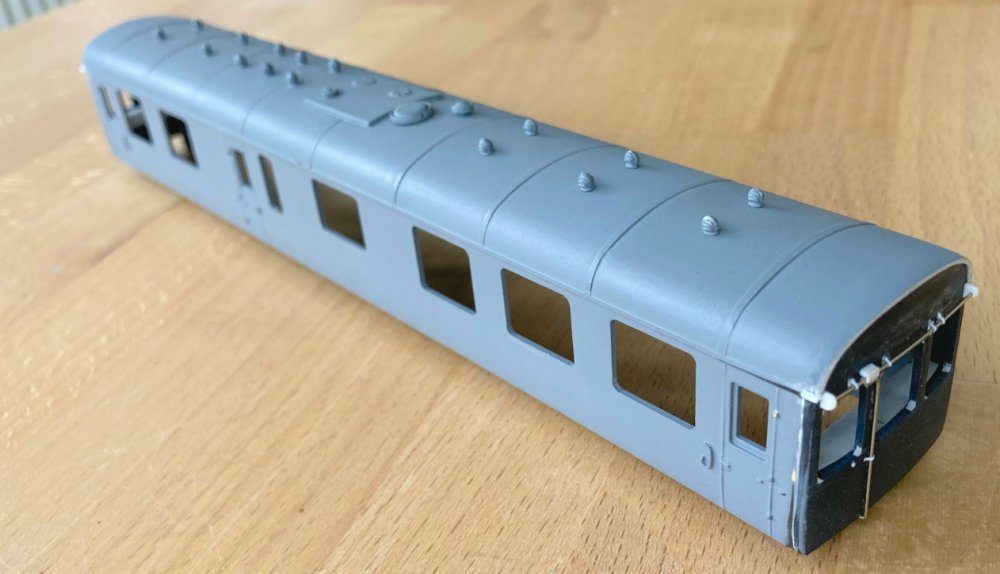
More sanding and filling was required to blend the ends into the body. Here we see the coach after
the roof had been extended very slightly over the newly modified ends. Also added were the extensions
to the rainstrips and the new pipework on the ends. These were different at each end and again featured
some very subtle changes over the years.

A rather cruel enlargement of the finished end after a coat of Halford’s finest. Now on to the opposite end.
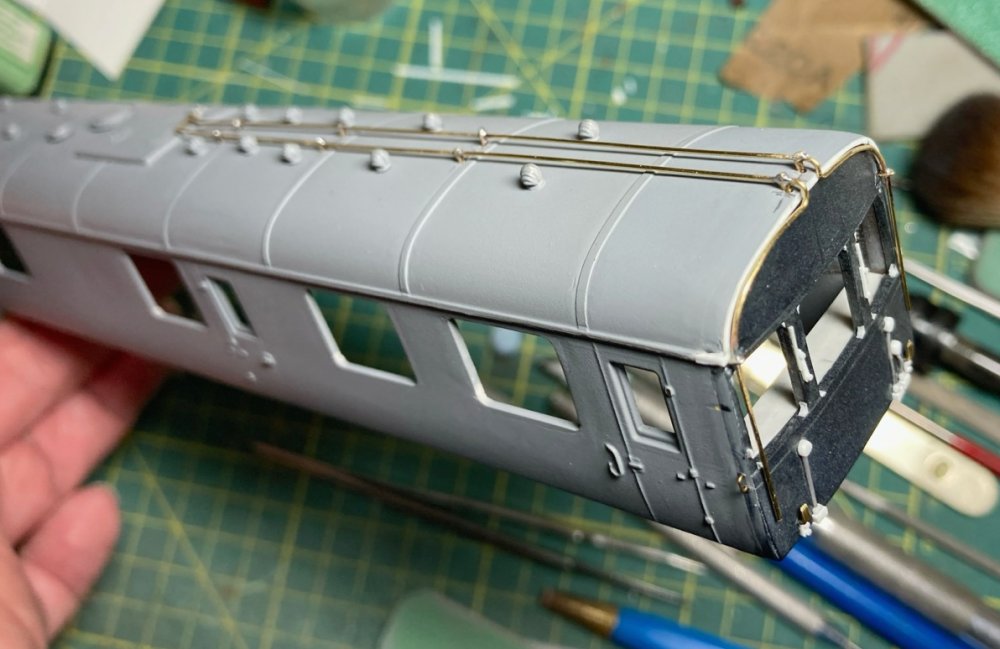
The other end featured the pipework that ran from the water filler and down beside the end windows.
This was bent up from 0.5mm brass wire (rather fiddly!) and then small loops of 0.33 wire were
wrapped around where the supports were and soldered on. All this slotted into holes in the roof and
ends where they were secured from beneath with a dab of superglue.

Another coat of primer and the body was ready to have the Kitmaster windows filed to shape for
fitting after painting. But that task will have to wait for a future update.
*********************************************************************************************************************************************

STEVE CARTER
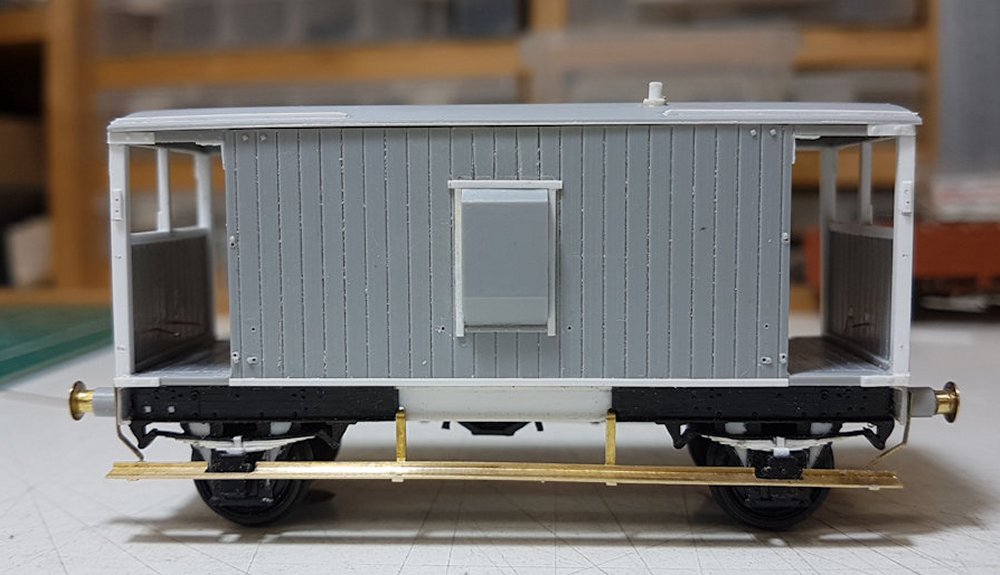
Available modelling time has seen a focus on the LMS D1940 brake van. One required correction
not originally picked up is the fact that these vans were equipped with heavy duty axleguards
rather than RCH type which necessitated in filling using triangular fillets. Another small
facet of D1940 difference is that the upper horizontal body side hand rail is marginally lower
than other diagrams with it being in line with the bottom of the ducket.
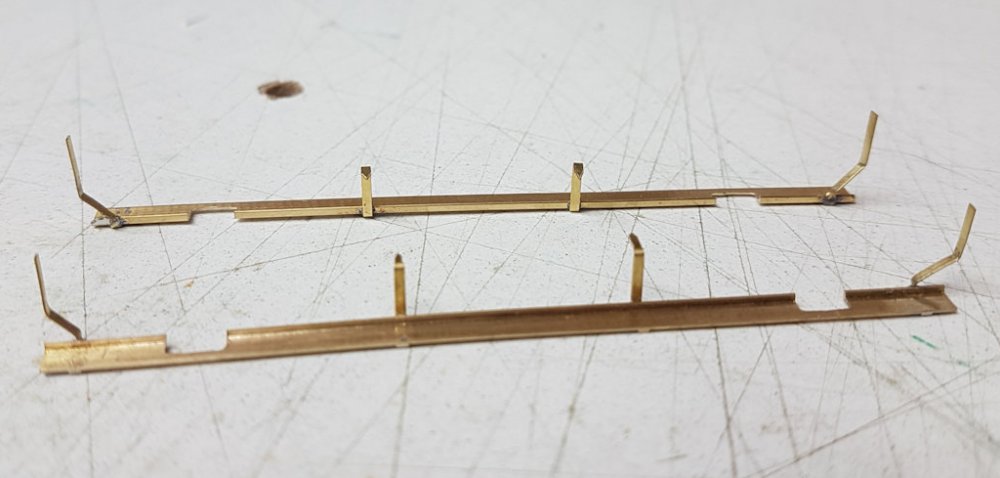
Full length foot boards were constructed from a variety of brass sections. Another point unique
to these vans are that the two outermost stanchions were fastened to the headstocks rather than
the solebars due to the extended 14' wheelbase making things rather cramped. This required a
'barley twist' to the flat section to bring them into the correct orientation.
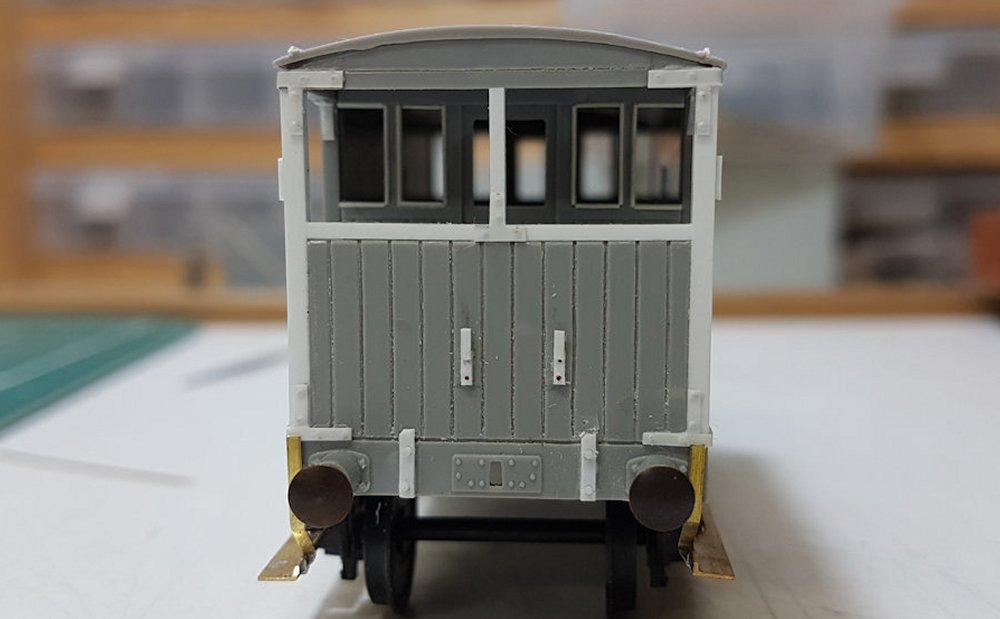
End on view showing replacement strapping and lamp brackets along with the central vertical
stanchion of the upper veranda which on previous diagrams was offset.
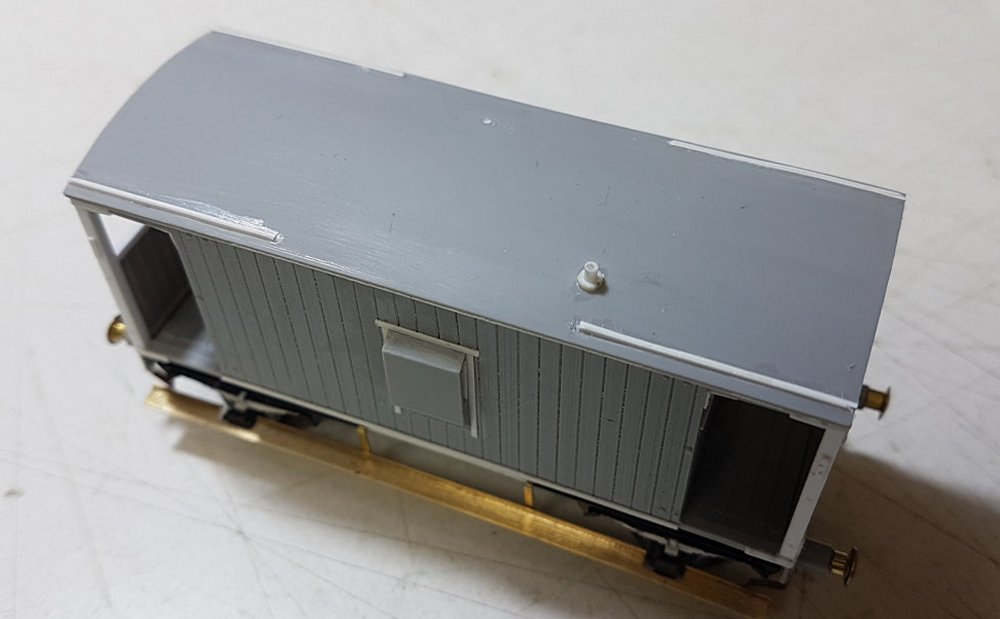
Roof detailing showing modified rain strips and stove chimney. As the kit comes, the chimney
is wrongly placed being opposite a ducket which would have hindered access.
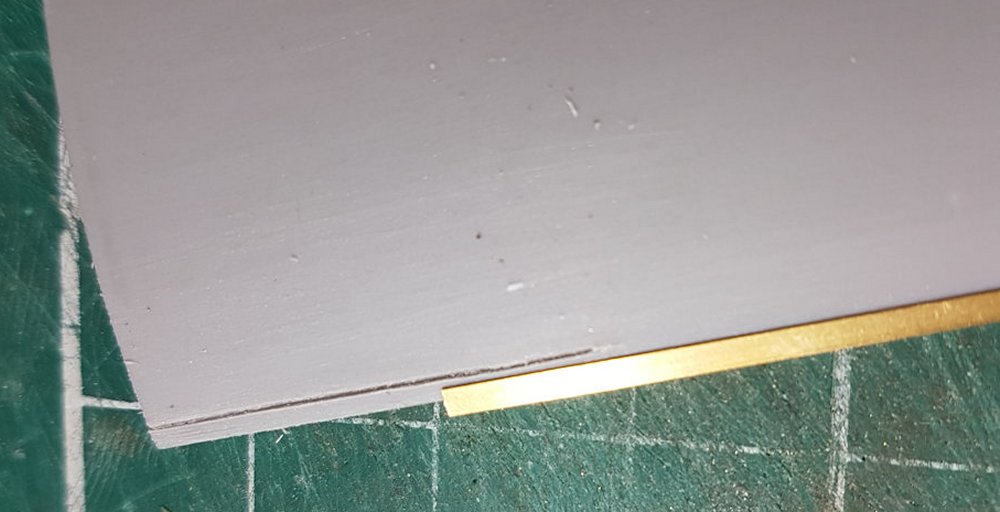
The rain strips have been constructed using 10 x 30 thou strip for the vertical section and
to aid both placement and strength have been fitted within a slot. The easiest way I have
found to ensure accuracy is to use brass 'L' section which can be held against the edge of
the roof whilst scoring the slots.

The cab ends of the kit are lacking in depth around the windows so have had beads added.
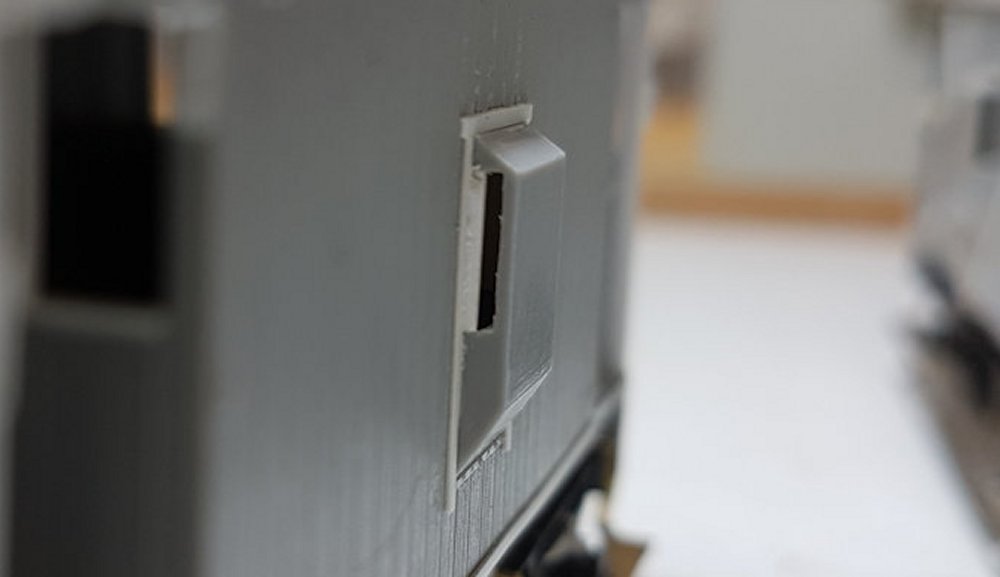
Another slight niggle with the kit is that the duckets feature windows which go full width
from the body side when in reality there is evidence of an edge between them so these
have now been added.
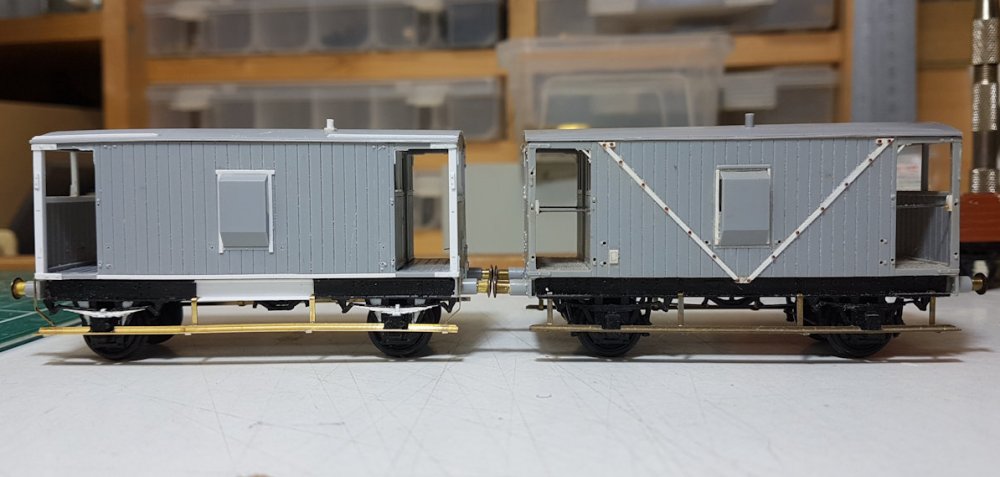
Comparison with a D1657 diagram van. Started some time ago, the loss of the roof hindered
progress but never the less shows the changes involved with conversion to a D1940 type
(it also shows the misplaced chimney quite well!). Both vehicles have had additional
strengthening added, a common feature of them during BR days; D1940 with a metal strip
along the bottom of the body side and D1657 with diagonal body side strapping.
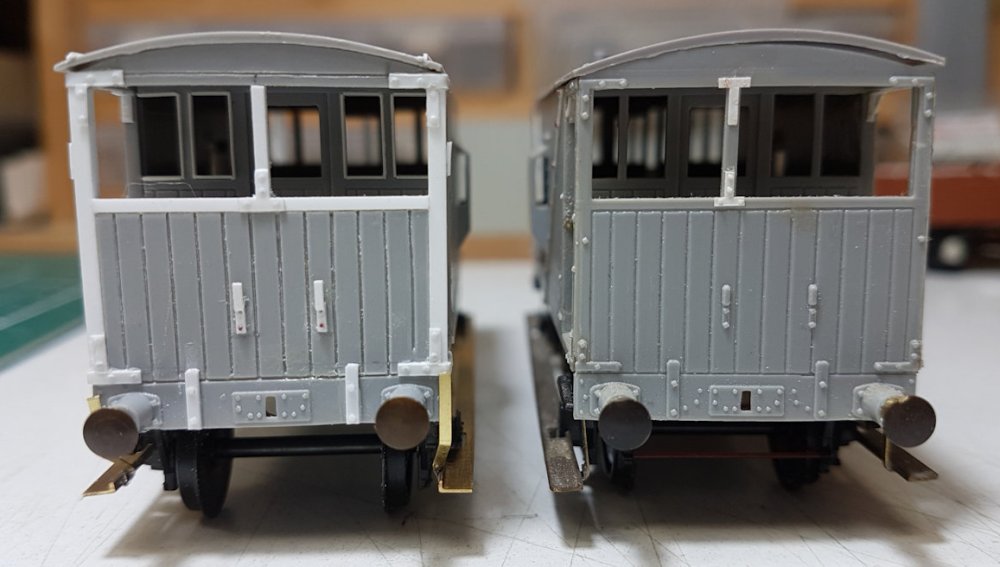
Comparison of ends reveals the differences in the position of the vertical veranda stanchion.
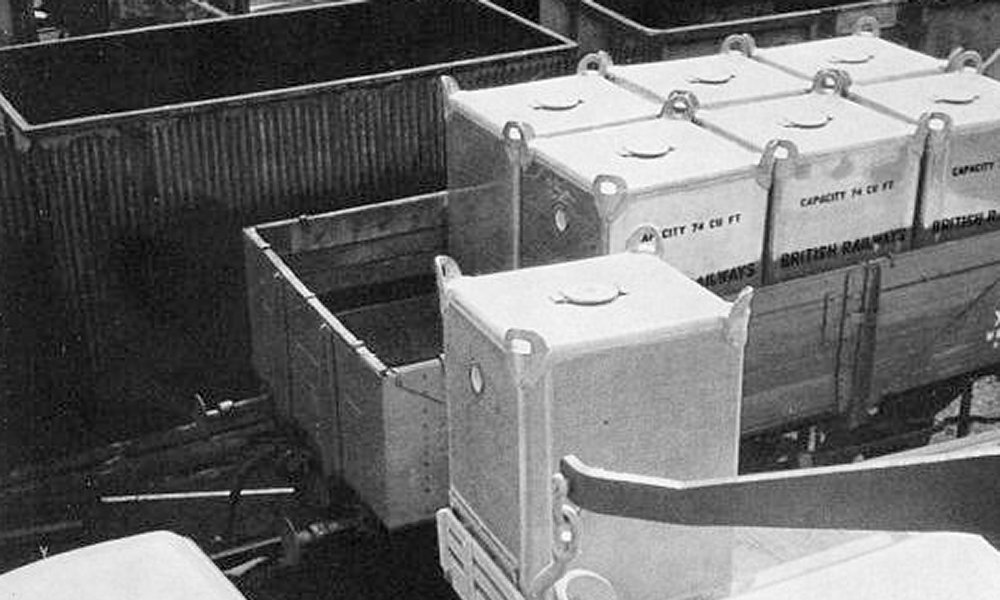
In the October update mention was made of 'T' type containers being conveyed in adapted
pipe wagons but further evidence has been found to show them being transported in unmodified
standard opens. These could be used to transport eight containers at a time but due to the
sides of the wagon being static then loading / unloading was carried out by crane. Thus
any containers being carried in this manner would require the fitting of additional
lifting brackets as shown in the image.
*********************************************************************************************************************************************

JONNY DUFFETT

I've certainly been bitten by the 3D printing bug and the range of items in my back catalogue
has not only increased, but the size of the items have become smaller too. My early attempts
with the filament printer produced results with too much banding, but since having moved onto
resin printing, a much smoother refined item can be produced. My initial resin prints had a much
better finish, but suffered from being too fragile and susceptible to fracture, making items
such as wagon buffers impractical. A change to ABS resin produces a much tougher item and allows
for very fine printing such as the handles on these BR tail lamps. D4120 of Shenston Road carries
a BR(W) tail lamp on the running plate, whilst a pallet of buffers has been delivered to the pad
ready for fitting to an awaiting wagon.
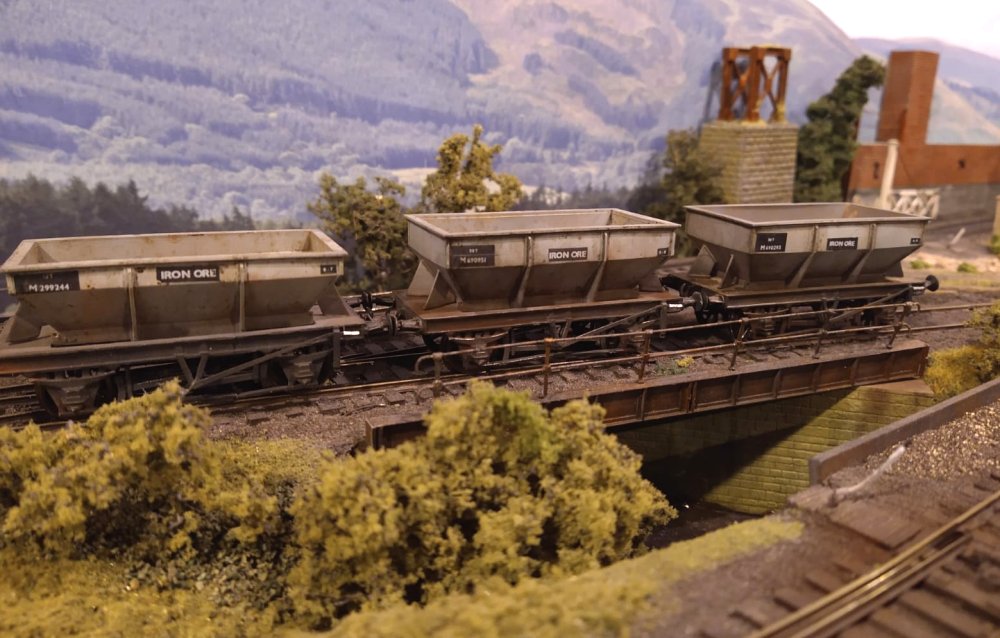
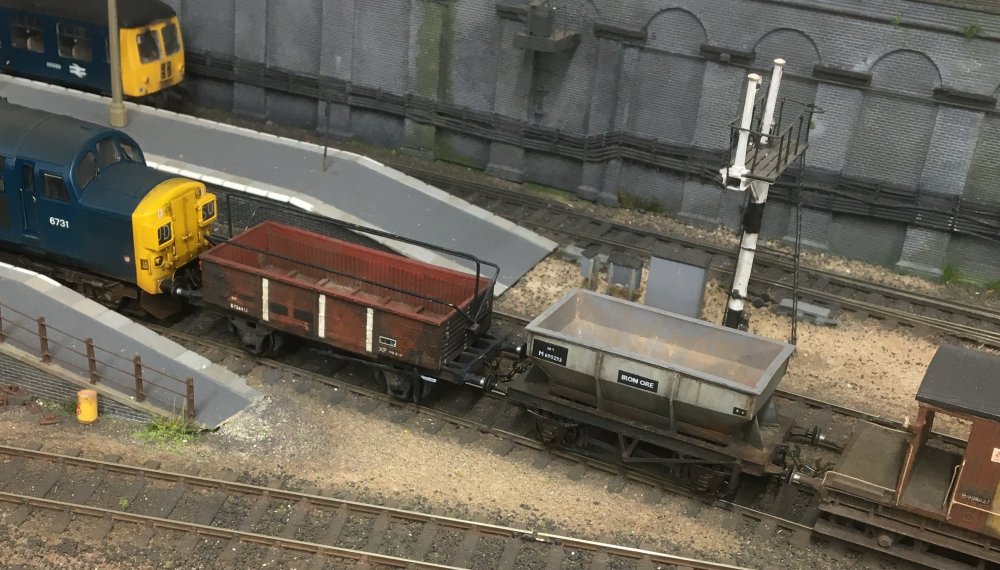
I've refined some of my earlier drawings with additional detail included in the print. This view
shows the LMS 20 ton iron ore hoppers which have recently been painted and detailed. The left
hand hopper is dia D1669 built 1924. The middle one is a Gloucester C&WW dia D1942 built 1936,
and the right hand hopper is a dia D1894 from 1934.
My latest projects include brake van side lamps, BR standard tail lamps, and BR(W) tail lamps,
as well as a few scenic items such as cosmetic fishplates and 3-bolt bullhead chairs for
decorating the lineside and for use as wagon loads. Click to see my current designs available
for free download at
Thingiverse 3D website. A selection of tail and side lamps are shown here being fitted
as part of a Hornsey Bdy brake van upgrade program.
*********************************************************************************************************************************************

PETE JOHNSON

In a scene recalling Ipswich docks in the long hot summer of 1976, 03 158 is seen at work
amongst air-braked vans of Dia 1/248, branded COV AB, later becoming VAA under the TOPS
system. Despite their length and wheelbase these vans were rated for a 2 chain (44 yard)
minimum curve.

Before its recent move to Colchester shed (which provided the Ipswich dock shunters) 03 158
had been a Hull Botanic Gardens machine, where stock shunts through the carriage washing
plant had given it the characteristic bleached livery.

The loco is seen resting between duties. It was to work from Colchester for eleven years
before withdrawal in July of 1987. In the background one of the vans shows fresh rebranding
with the recently adopted Railfreight logo on a maroon patch.
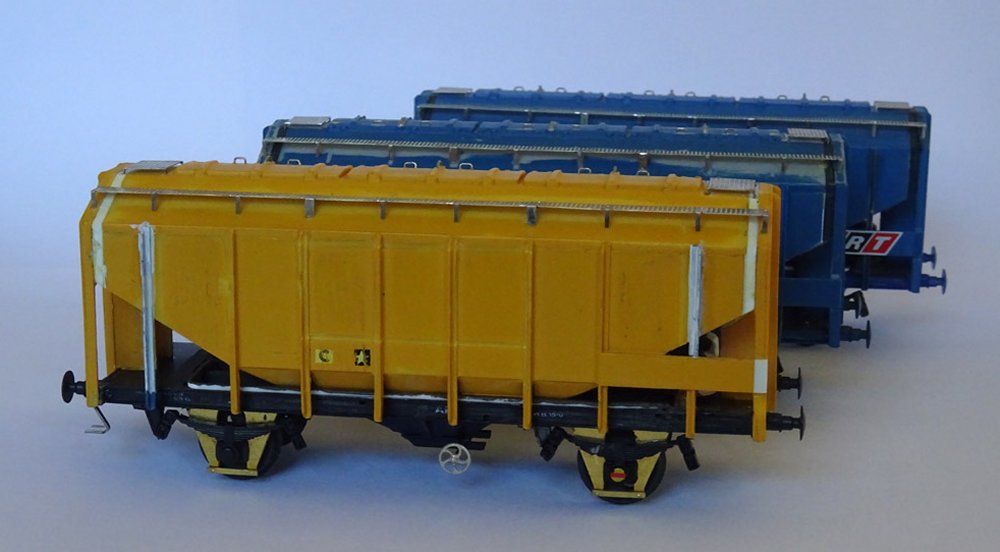
On the workbench a further five 35t BRT grain wagons are underway. Fitting of the etched
details is progressing on the modified Bachmann bodies. The models will be finished as
four blue poster-board examples, and one ex-Maltsters Association yellow wagon.
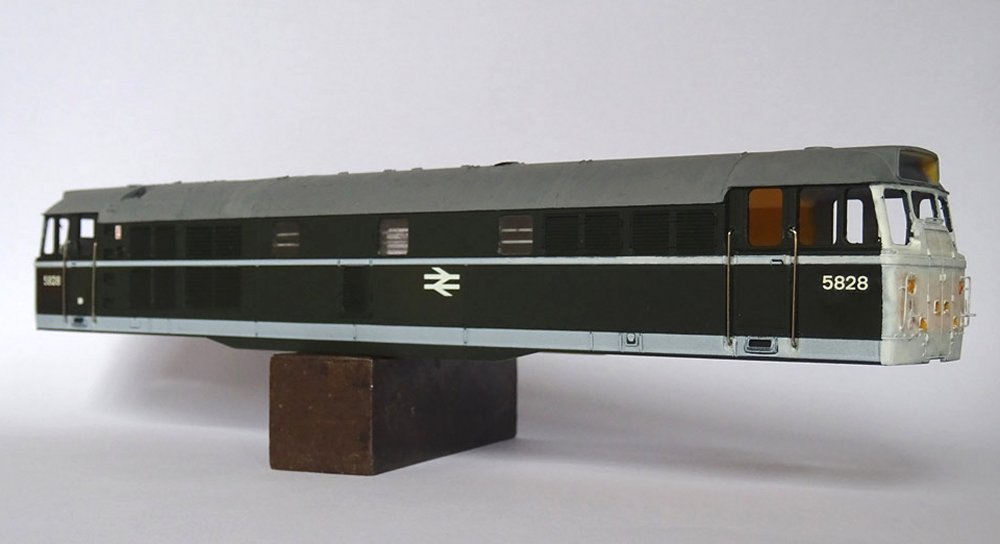
Another example of Eastern Region adoption of the new BR image is also at an early stage.
In 1967-68 a considerable number of ER class 31s had new vinyl badges and numbers applied
onto the existing lined green livery. 5828 was a typical example, originally re-marked with
a D prefix but this was painted over within a year or so, leaving the numbers offset slightly.
The loco was passed to the Western Region during 1972, to replace the smaller diesel-hydraulics,
still wearing this hybrid livery.
*********************************************************************************************************************************************

The Eastwell Ironstone Company works manager Paul James has decided to offer for sale a
range of items which have been cluttering up the works yard for many years, and with so
many other projects to concentrate on, the first of a long list of items can be found by
clicking
here


